Hyundai Tucson: Rear Door Trim - Replacement
Hyundai Tucson - Fourth generation (NX4) - (2020-2023) - Workshop Manual / Body (Interior and Exterior) / Rear Door / Rear Door Trim - Replacement
- Pull down the rear door window glass to the lowest level by pressing the power window glass switch.
- Remove the rear door belt outside weatherstrip (A).
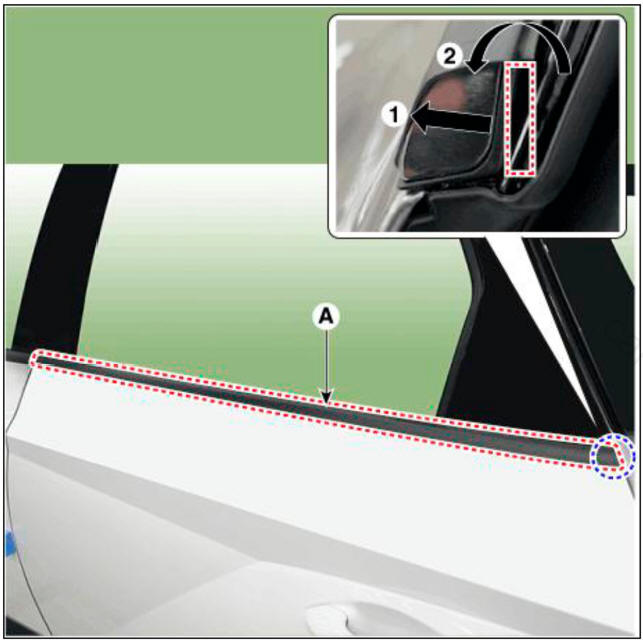
- To install, reverse the removal procedure.
WARNING
Replace any damaged clips.
Replacement
- Remove the rear door trim.
(Refer to Rear Door - "Rear Door Trim")
- Remove the rear door belt inside weatherstrip (A).
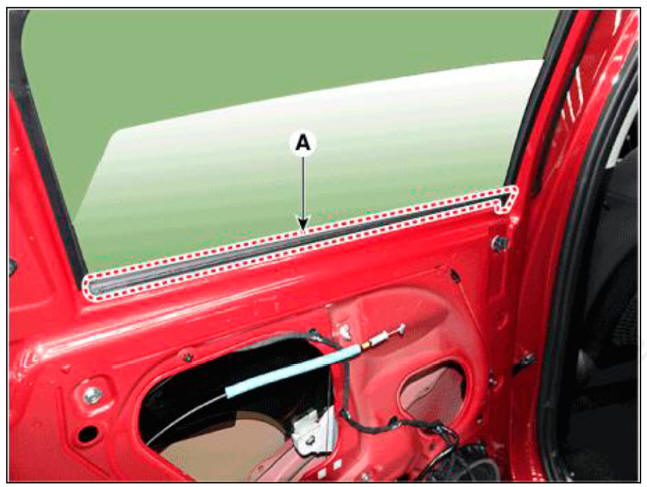
- To install, reverse the removal procedure.
WARNING
When installing, install it by first contacting the inside part (basis point of assembly) of arrow to door frame.
Replacement
Rear door side weatherstrip
- Loosen the rear door checker (B) mounting bolt.
Tightening torque : 16.7 - 21.6 N.m (1.7 - 2.2 kgf.m, 12.3 - 15.9 lb-ft)
- Detach the clips, then remove the rear door side weatherstrip (A).
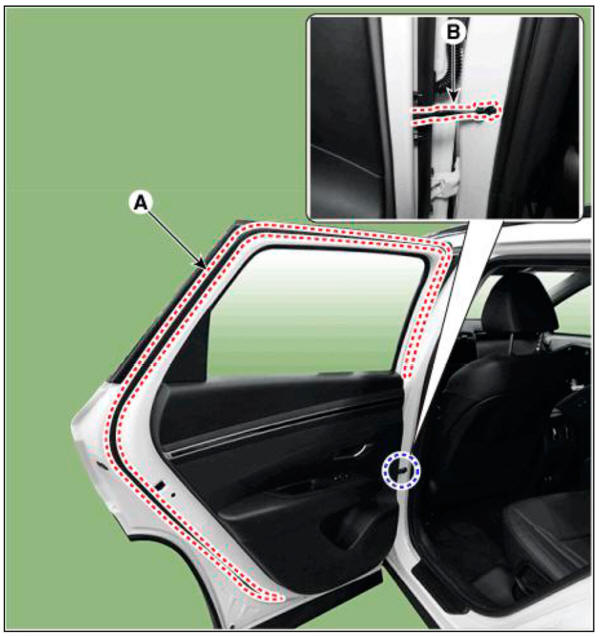
- To install, reverse the removal procedure
WARNING
Replace any damaged clips.
Rear door body side weatherstrip
- Remove the rear door body side weatherstrip (A).
 Rear door body side weatherstrip - LH
 Rear door body side weatherstrip - RH
- To install, reverse the removal procedure.
READ NEXT:
 Rear door latch
Component Location
Rear door latch
Replacement
WARNING
When removing with a flat-tip screwdriver or remover, wrap
protective tape around the tools to prevent
damage to components.
Put on gloves to prevent hand injuries.
R
Body Side Molding
Replacement
WARNING
When removing with a flat-tip screwdriver or remover, wrap
protective tape around the tools to prevent
damage to components.
Put on gloves to prevent hand injuries.
Remove the roof trim.
(Refer to Roof Trim - &
Rear Spoiler
Component Location
Rear Spoiler
Replacement
WARNING
When removing with a flat-tip screwdriver or remover, wrap
protective tape around the tools to prevent
damage to components.
Put on gloves to prevent hand injuries.
Remo
SEE MORE:
Anti-lock Brake System (ABS)
WARNING
Anti-Lock Braking System (ABS) or
Electronic Stability Control (ESC)
system will not prevent accidents
due to improper or dangerous driving
maneuvers. Even though vehicle
control is improved during emergency
braking, always maintain a
Smart Cruise Control Settings
Setting features
To turn on the Smart Cruise Control
Press the Driving Assist ( ) button
to turn on Smart Cruise Control. The
speed will be set to the current speed
on the cluster.
If there is no vehicle in front of you,
the
Information
- Home
- Hyundai Tucson - Fourth generation (NX4) - (2020-2023) - Owner's Manual
- Hyundai Tucson - Fourth generation (NX4) - (2020-2023) - Workshop Manual