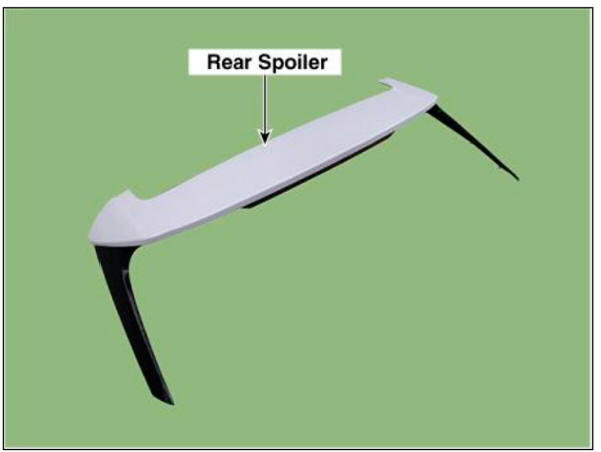
Hyundai Tucson: Rear Spoiler
Component Location

- Rear Spoiler
Replacement
WARNING
- When removing with a flat-tip screwdriver or remover, wrap protective tape around the tools to prevent damage to components.
- Put on gloves to prevent hand injuries.
- Remove the tailgate upper trim.
(Refer to Tail Gate - "Tail Gate Trim")
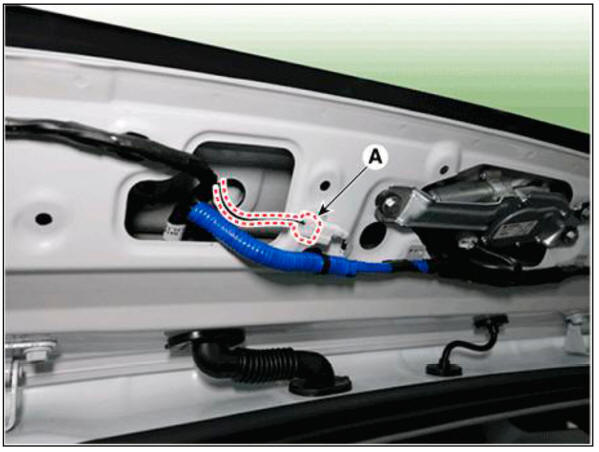
- Disconnect the rear stop lamp connector (A).
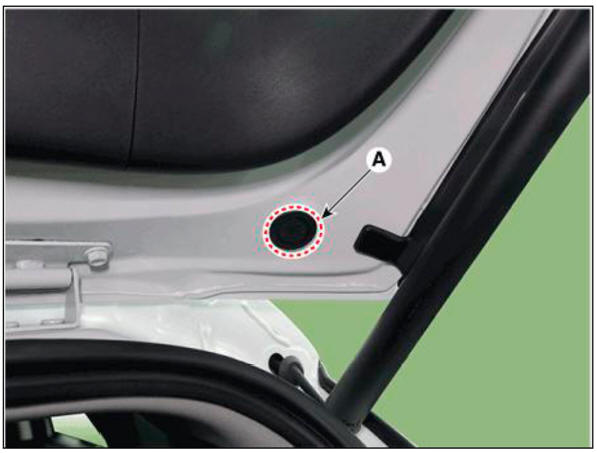
- Remove the tailgate plug hole (A).
LH

RH
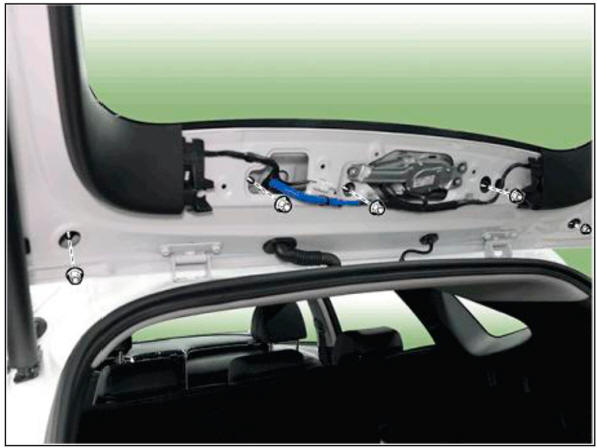
- Loosen the mounting nuts, remove the rear spoiler (A).
Tightening torque : 3.3 - 4.4 N.m (0.34 - 0.46 kgf.m, 2.5 - 3.3 lb-ft)
- To install, reverse the removal procedure.
WARNING
- Make sure the connector is connected properly.
- Replace any damaged clips (orpin-type retainers).
Replacement
WARNING
- When removing with a flat-tip screwdriver or remover, wrap protective tape around the tools to prevent damage to components.
- Put on gloves to prevent hand injuries.
- Using a screwdriver or remover, remove the fender garnish (A).
- To install, reverse removal procedure.
WARNING
Replace any damaged clips (or pin-type retainers).
Replacement
WARNING
- When removing with a flat-tip screwdriver or remover, wrap protective tape around the tools to prevent damage to components.
- Put on gloves to prevent hand injuries.
- Using a screwdriver or remover, remove the quarter garnish (A).
- To install, reverse removal procedure.
WARNING
Replace any damaged clips (or pin-type retainers).
Replacement
WARNING
- When removing with a flat-tip screwdriver or remover, wrap protective tape around the tools to prevent damage to components.
- Put on gloves to prevent hand injuries.
- Loosen the mounting nuts, remove the front door garnish (A) and rear door garnish (B).
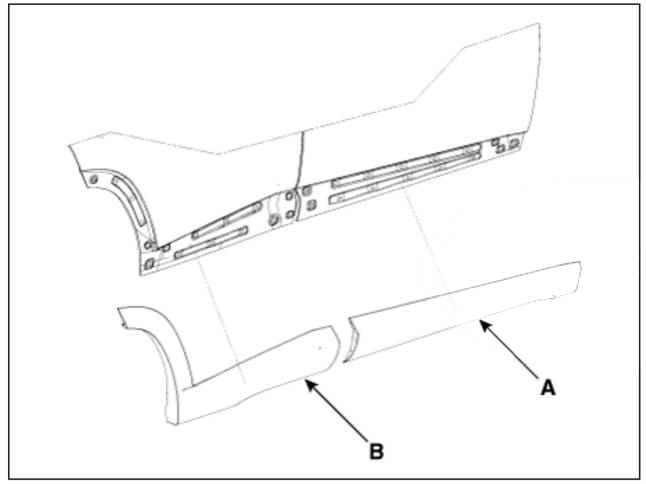
- To install, reverse the removal procedure.
WARNING
Replace any damaged clips (or pin-type retainers).
Replacement
WARNING
- When removing with a flat-tip screwdriver or remover, wrap protective tape around the tools to prevent damage to components.
- Put on gloves to prevent hand injuries.
- Using a screwdriver or remover, remove the C pillar garnish (A).
- To install, reverse the removal procedure.
WARNING
- Replace any damaged clips (or pin-type retainers).
Replacement
WARNING
- When removing with a flat-tip screwdriver or remover, wrap protective tape around the tools to prevent damage to components.
- Put on gloves to prevent hand injuries.
- Remove the engine room under cover.
(Refer to Engine Mechanical System - "Engine Room Under Cover")
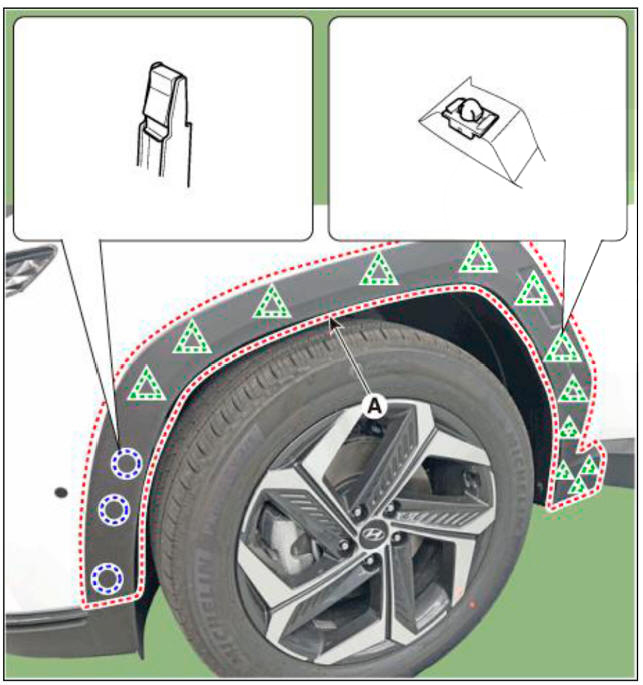
- Remove the front tire.
(Refer to Suspension System - "Wheel")
- Loosen the mounting nuts, bolts and screws, remove the front wheel guard (A).

- To install, reverse the removal procedure.
WARNING
Replace any damaged clips (or pin-type retainers).
Replacement
WARNING
- When removing with a flat-tip screwdriver or remover, wrap protective tape around the tools to prevent damage to components.
- Put on gloves to prevent hand injuries.
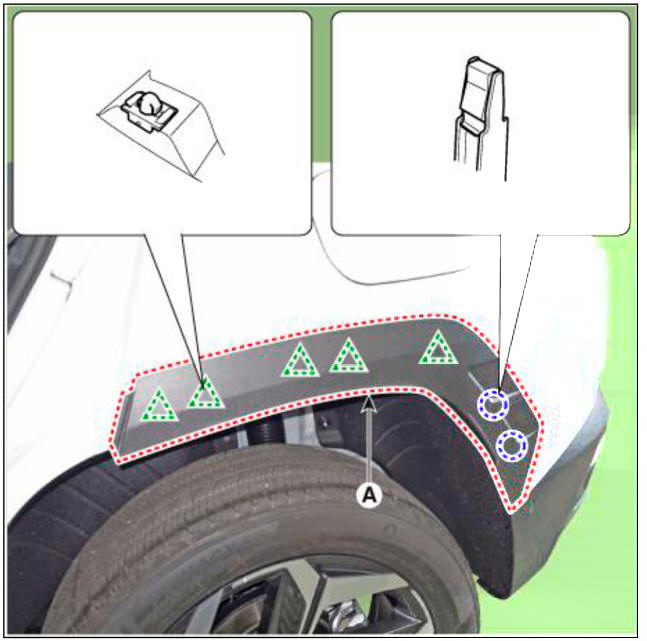
- Remove the rear tire.
(Refer to Suspension System - "Wheel")
- Loosen the mounting nuts and screws, remove the rear wheel guard (A).
- To install, reverse the removal procedure.

WARNING
Replace any damaged clips (or pin-type retainers).
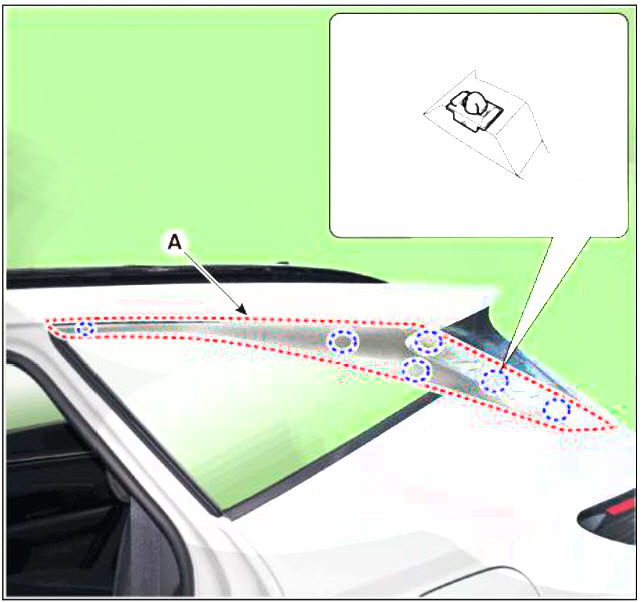
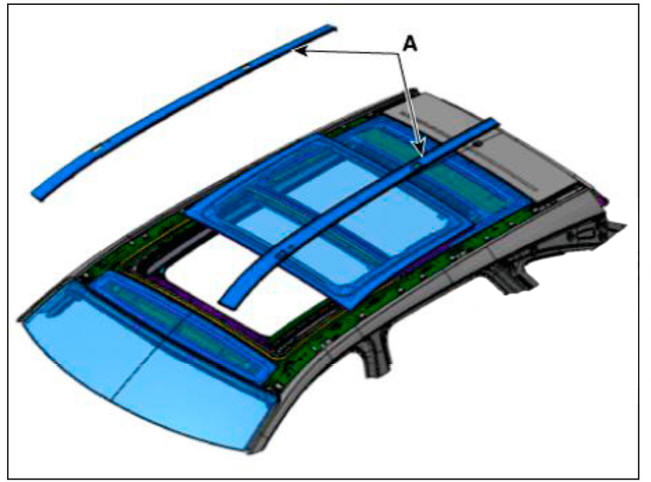
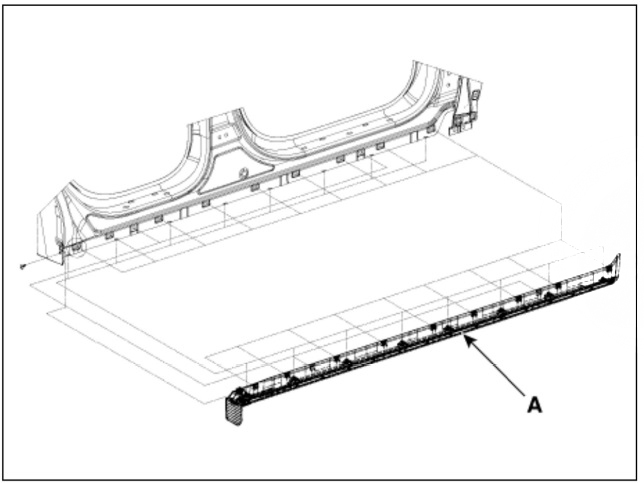
Replacement
WARNING
- When removing with a flat-tip screwdriver or remover, wrap protective tape around the tools to prevent damage to components.
- Put on gloves to prevent hand injuries.
- Using a screwdriver or remover, remove the roof side molding (A).
- To install, reverse the removal procedure.
WARNING
Replace any damaged clips (or pin-type retainers).
Replacement
WARNING
- When removing with a flat-tip screwdriver or remover, wrap protective tape around the tools to prevent damage to components.
- Put on gloves to prevent hand injuries.
- Loosen the mounting screws, remove the side seal molding (A).
- To install, reverse the removal procedure.
WARNING
Replace any damaged clips (or pin-type retainers).
READ NEXT:
 Tailgate back panel
Component Location
Tailgate back panel
Replacement
WARNING
Put on gloves to prevent hand injuries.
WARNING
Take care not to scratch the tailgate and body surface.
Remove the tailgate lower trim.
(Refer to Tail Gate - "Tail G
Panorama Sunroof - Component
Mechanism rail assembly
Center cover assembly
Roller blind motor
Glass motor
Panorama sunroof frame assembly
Roof side molding
Decoration cover
Movale glass
Wind deflecter
Front cover assembly
Front glass
SEE MORE:
Diagnostic Procedure Using a Diagnostic
Instrument
The following section describes how to diagnose faults using a diagnostic
instrument.
Connect the diagnostic instalment to the self-diagnostic connector
(16-pin) beneath the crash pad on the side of driver's
seat, and then
Clutch fork and clutch bearing
Components
Clutch housing
Engagement bearing 2 (Even)
Egnagement bearing 1 (Odd)
Engagement bearing sleeve
Clutch engagement fork
Removal
Remove the dual clutch transmission from the vehicle
(Refer to Dual Clutch Transmissio
Information
- Home
- Hyundai Tucson - Fourth generation (NX4) - (2020-2023) - Owner's Manual
- Hyundai Tucson - Fourth generation (NX4) - (2020-2023) - Workshop Manual