Hyundai Tucson: Front Door - Replacement
Hyundai Tucson - Fourth generation (NX4) - (2020-2023) - Workshop Manual / Body (Interior and Exterior) / Front Door / Front Door - Replacement
- Remove the outside rear view mirror.
(Refer to Mirror - "Outside Rear View Mirror")
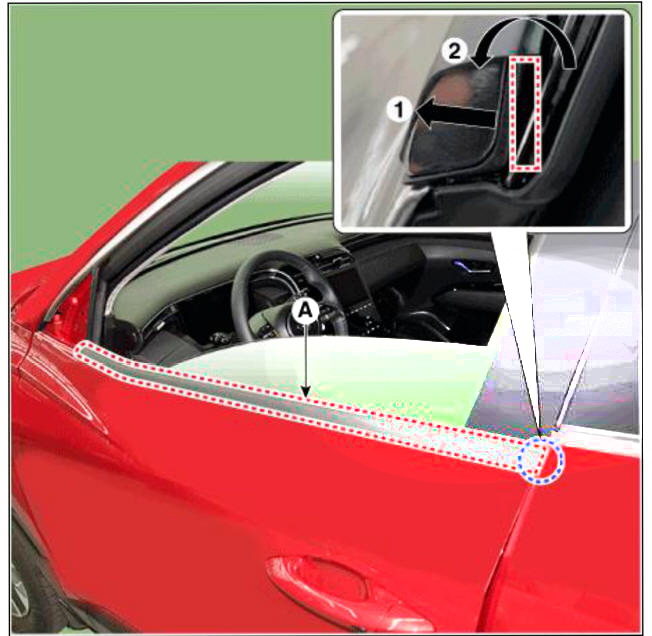
- Remove the front door belt outside weatherstrip (A).

- To install, reverse the removal procedure.
WARNING
Replace any damaged clips (or pin - type retainers).
Replacement
- Remove the front door trim.
(Refer to Front Door - "Front Door Trim")
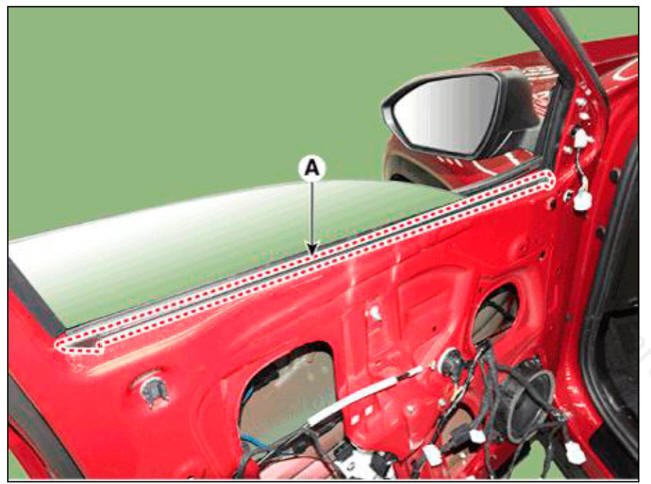
- Remove the front door belt inside weatherstrip (A).

- To install, reverse the removal procedure.
WARNING
When installing, install it by first contacting the inside part (basis point of assembly) of arrow to door frame.
Replacement
Front door side weatherstrip
- Loosen the front door checker (B) mounting bolt.
Tightening torque : 18.6 - 28.4 N.m (1.7 - 2.2 kgf.m,13.7 - 21.0 lb-ft)
- Detach the clips, then remove the front door side weatherstrip (A).
- To install, reverse the removal procedure.

WARNING
Replace any damaged clips (or pin - type retainers).
Front door body side weatherstrip
- Remove the front door body side weatherstrip (A).
 Front door body side weatherstrip - LH
 Front door body side weatherstrip - RH
- To install, reverse the removal procedure.
READ NEXT:
 Front door latch
Component Location
Front door latch
Replacement
WARNING
When removing with a flat-tip screwdriver or remover, wrap
protective tape around the tools to prevent
damage to components.
Put on gloves to prevent hand injuries.
 Rear Door - Glass Adjustment
WARNING
Check the glass run channel for damage or deterioration, and replace
them if necessary.
Remove the rear door trim.
(Refer to Rear Door - "Rear Door Trim")
Lower the glass by operating the power window switch until the gla
SEE MORE:
 Changing a tire with TPMS
If you have a flat tire, the Low Tire
Pressure and Position telltales will come
on. We recommend that you have the flat
tire repaired by an authorized HYUNDAI
dealer as soon as possible or replace the
flat tire with the spare tire.
NOTICE
It i
 Water Inlet Fitting
Remove the engine room under cover.
(Refer to Engine and Transaxle Assembly - "Engine Room Under Cover")
Drain the coolant.
(Refer to Cooling System - "Coolant")
Disconnect the radiator lower hose (A).
Disconn
Information
- Home
- Hyundai Tucson - Fourth generation (NX4) - (2020-2023) - Owner's Manual
- Hyundai Tucson - Fourth generation (NX4) - (2020-2023) - Workshop Manual