Hyundai Tucson: Center pillar trim
Component Location
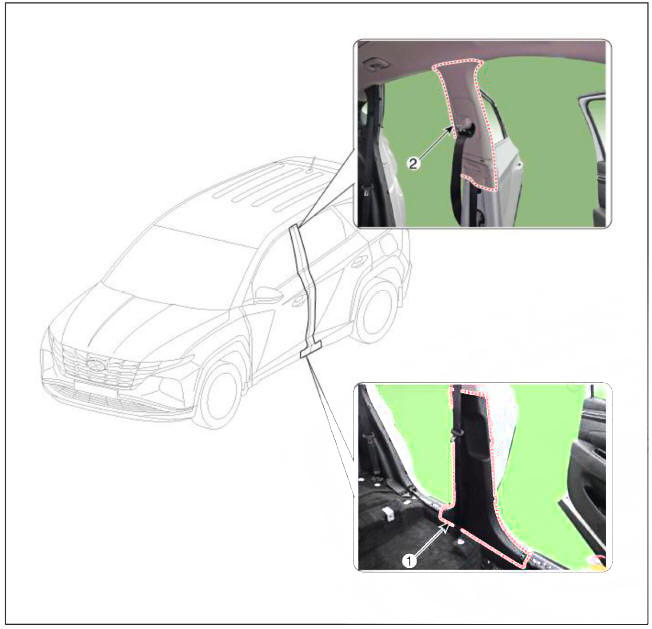
- Center pillar lower trim
- Center pillar upper trim
Replacement
Center pillar lower trim
WARNING
- When removing with a flat-tip screwdriver or remover, wrap protective tape around the tools to prevent damage to components.
- Put on gloves to prevent hand injuries.
WARNING
Take care not to bend or scratch the trim and panels.
- Remove the front and rear door scuff trim.
(Refer to Interior Trim -"Door Scuff Trim")
- Using a remover and remove the center pillar lower trim (A)
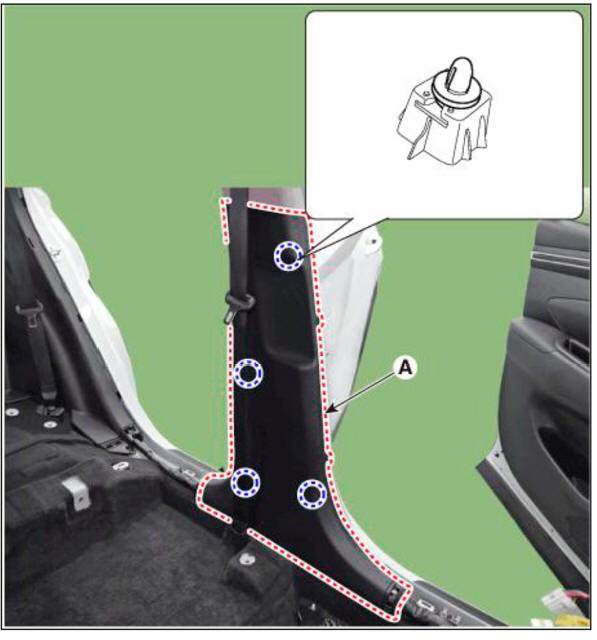
- To install, reverse removal procedure.
WARNING
Replace any damaged clips (orpin-type retainers).
Center pillar upper trim
WARNING
- When removing with a flat-tip screwdriver or remover, wrap protective tape around the tools to prevent damage to components.
- Put on gloves to prevent hand injuries.
WARNING
Take care not to bend or scratch the trim and panels.
- Remove the center pillar lower trim.
(Refer to Interior Trim -"Center Pillar Lower Trim")
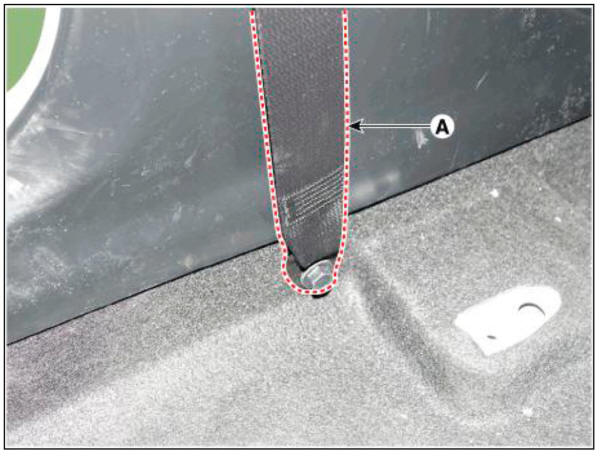
- Loosen the mounting bolt, remove the front seat belt lower anchor (A).
Tightening torque : 39.2 - 53.9 N.m (4.0 - 5.5 kgf.m, 28.9 - 39.8 lb-ft)
- Remove the center pillar upper trim (A).
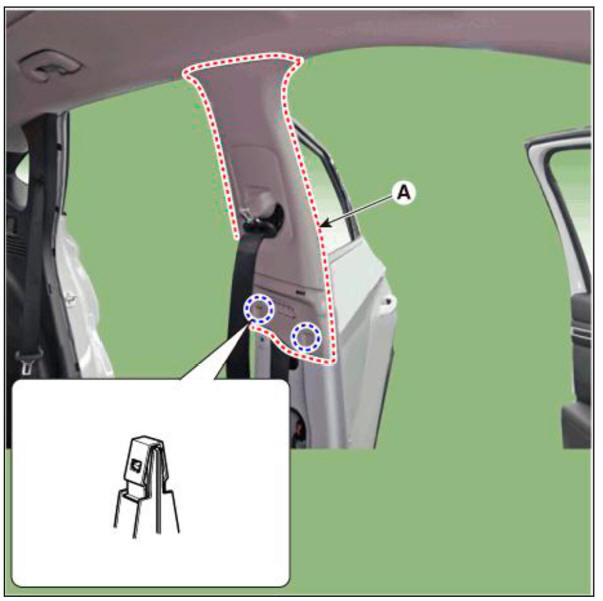
- To install, reverse removal procedure.
WARNING
Replace any damaged clips (orpin-type retainers).
READ NEXT:
 Rear pillar trim
Component Location
Rear pillar trim
Replacement
WARNING
When removing with a flat-tip screwdriver or remover, wrap
protective tape around the tools to
prevent damage to components.
Put on gloves to prevent hand injuries.
WAR
Trunk Trim
Components
Luggage tray
Wheel house pad
Luggage side trim
Rear transverse trim
Cargo screen
Luggage board
Rear transverse trim
Component Location
Rear transverse trim
Replacement
WARNING
When removing with a flat-tip screwdriver or remover, wrap
protective tape around the tools to
prevent damage to components.
Put on gloves to prevent hand injuries.
SEE MORE:
Engine oil
Checking the engine oil level
Engine oil is used for lubricating,
cooling, and operating various hydraulic
components in the engine. Engine oil
consumption while driving is normal,
and it is necessary to check and refill the
engine oil regularl
Exhaust Gas Temperature Sensor (EGTS)
Description
Exhaust Gas Temperature Sensor (EGTS) is installed on Gasoline Particulate
Filter (GPF) senses the
temperature of exhaust gas flowing into. When pre-determined engine condition is
set, ECM burns
soot gathered in GPF with exhaust ga
Information
- Home
- Hyundai Tucson - Fourth generation (NX4) - (2020-2023) - Owner's Manual
- Hyundai Tucson - Fourth generation (NX4) - (2020-2023) - Workshop Manual
