Hyundai Tucson: Tail Gate - Replacement
Hyundai Tucson - Fourth generation (NX4) - (2020-2023) - Workshop Manual / Body (Interior and Exterior) / Tail Gate / Tail Gate - Replacement
Replacement
Tailgate upper trim
WARNING
- When removing with a flat-tip screwdriver or remover, wrap protective tape around the tools to prevent damage to components.
- Put on gloves to prevent hand injuries.
- Using a screwdriver or remover, remove the tailgate upper trim (A).
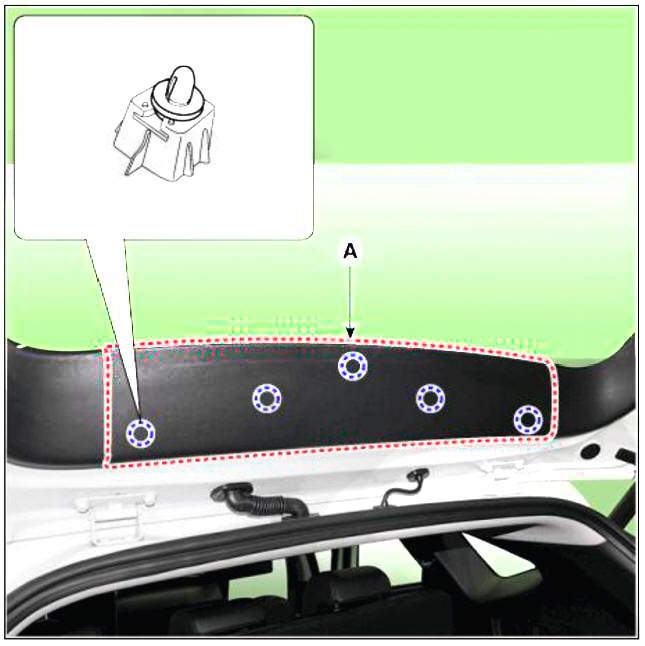
- To install, reverse removal procedure
WARNING
Replace any damaged clips (or pin-type retainers).
Tailgate side trim
WARNING
- When removing with a flat-tip screwdriver or remover, wrap protective tape around the tools to prevent damage to components.
- Put on gloves to prevent hand injuries.
- Remove the tailgate upper trim.
- Using a screwdriver or remover, remove the side trim (A).
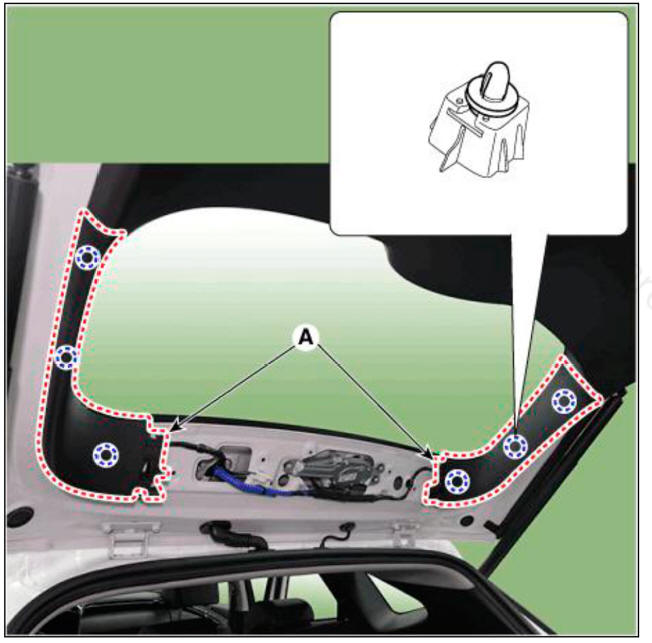
- To install, reverse removal procedure.
WARNING
Replace any damaged clips (or pin-type retainers).
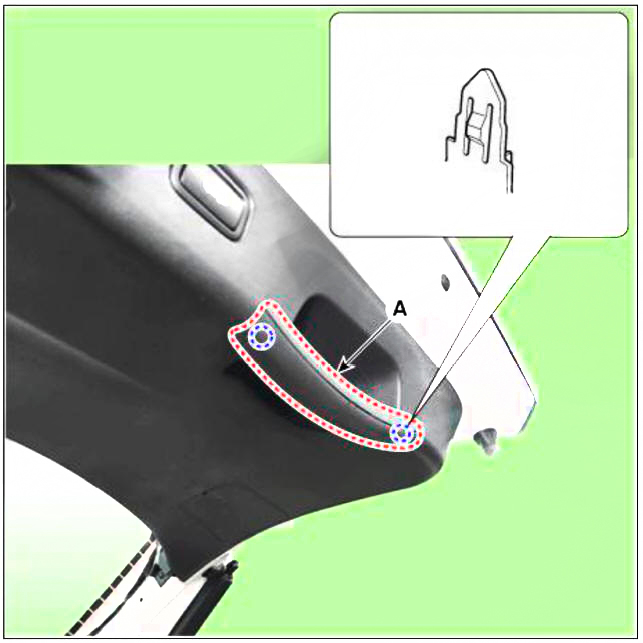
Tailgate lower trim
WARNING
- When removing with a flat-tip screwdriver or remover, wrap protective tape around the tools to prevent damage to components.
- Put on gloves to prevent hand injuries.
- Disconnect the negative (-) battery terminal.
- Remove the tailgate side trim.
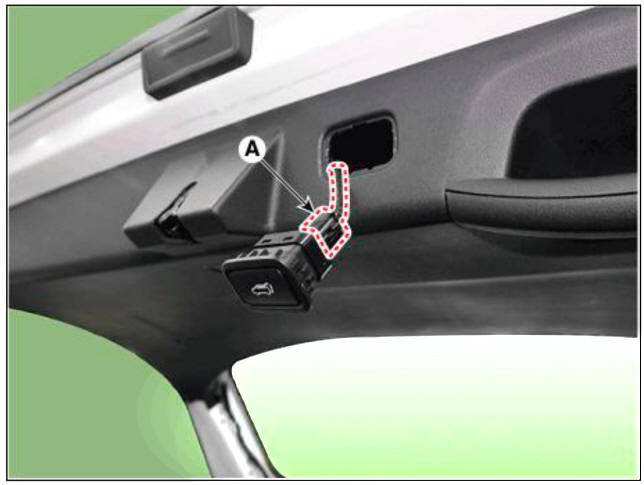
- Using a screwdriver or remover, remove the pull handle (A).
- Using a screwdriver or remover, remove the PTG inner switch (A).
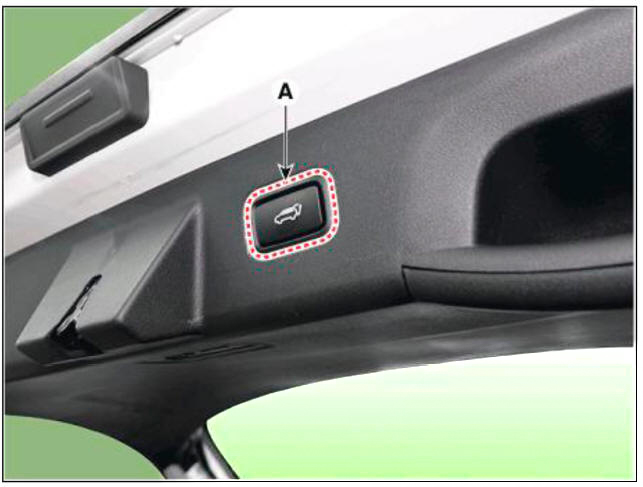
- Desconnect the PTG inner switch connector (A).
- After loosening the mounting screws and fastner remove the tailgate lower trim (A).
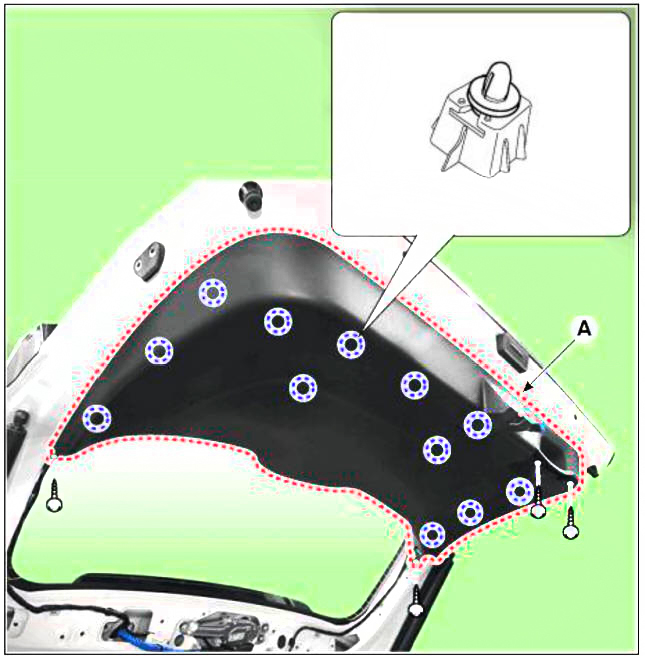
- To install, reverse removal procedure.
WARNING
- Make sure the connectors are connected in properly.
- Replace any damaged clips (or pin-type retainers).
READ NEXT:
 Tailgate latch assembly
Component Location
Tailgate latch assembly
Replacement
WARNING
When removing with a flat-tip screwdriver or remover, wrap
protective tape around the tools to prevent
damage to components.
Put on gloves to prevent hand injuries.
Fuel Filler Door
Component Location
Fuel filler door
Replacement
Fuel filler door cover
WARNING
When removing with a flat-tip screwdriver or remover, wrap
protective tape around the tools to
prevent damage to components.
Put on gloves to preve
SEE MORE:
Condensor - Inspection
WARNING
Before measuring the pressure of the refriferant line, check whether
the refrigerant amount is charged in
accordance with the specified charging amount.
(Refer to Heating, Ventilation, Air Conditioning - "Specifications")
48V Battery System - Repair procedures (Removal)
Turn ignition switch OFF and disconnect the battery (-) terminal.
Remove the 48V battery assembly.
(Refer to 48V Battery System - "Repair procedures")
Remove the battery cover (A) after loosening the mounting bolts.
Tightenin
Information
- Home
- Hyundai Tucson - Fourth generation (NX4) - (2020-2023) - Owner's Manual
- Hyundai Tucson - Fourth generation (NX4) - (2020-2023) - Workshop Manual
