Hyundai Tucson: Roof trim assembly
Component Location
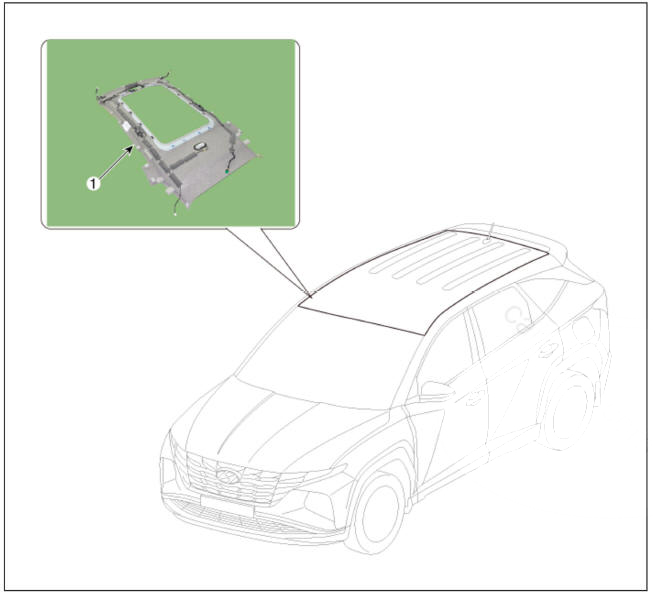
- Roof trim assembly
Replacement
WARNING
- When removing with a flat-tip screwdriver or remover, wrap protective tape around the tools to prevent damage to components.
- Put on gloves to prevent hand injuries.
WARNING
Take care not to bend or scratch the trim and panels.
- Remove the front seat.
(Refer to Front Seat - "Front Seat Assembly")
- Remove the rear seat.
(Refer to Rear Seat - "Rear Seat Assembly")
- Remove the front pillar trim.
(Refer to Interior Trim - "Front Pillar Trim")
- Remove the center pillar upper trim.
(Refer to Interior Trim - "Center Pillar Trim")
- Remove the rear pillar trim.
(Refer to Interior Trim - "Rear Pillar Trim")
- Remove the sunvisor and retainer.
(Refer to Roof Trim - "Sunvisor")
- Remove the assist handle.
(Refer to Roof Trim - "Assist Handle")
- Remove the overhead console lamp.
(Refer to Body Electrical System - "Overhead Console Lamp")
- Remove the room lamp.
(Refer to Body Electrical System - "Room Lamp")
- Remove the ECM mirror connector.
(Refer to Body Electrical System - "Electro Chromic Inside Rear View Mirror")
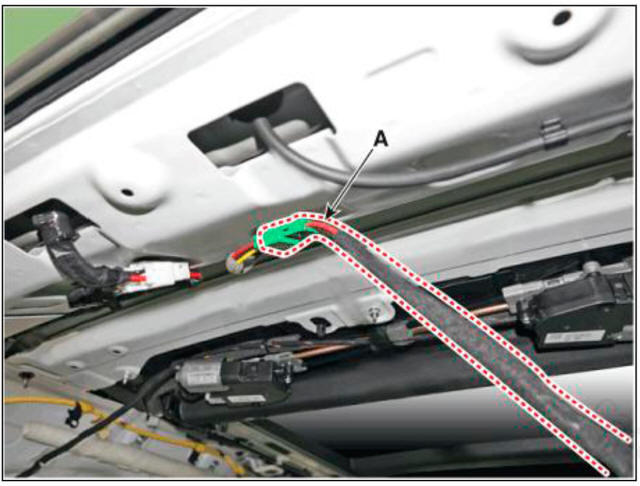
- Separate the roof trim main connector (A) from the front pillar section.
LH

RH
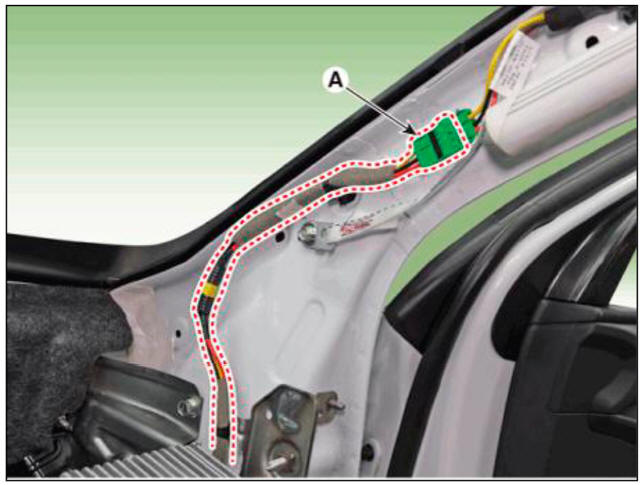
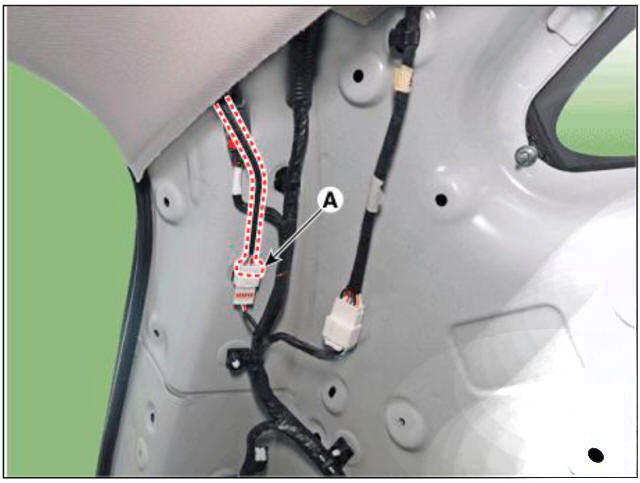
- Separate the roof trim main connector (A) from the rear pillar section.
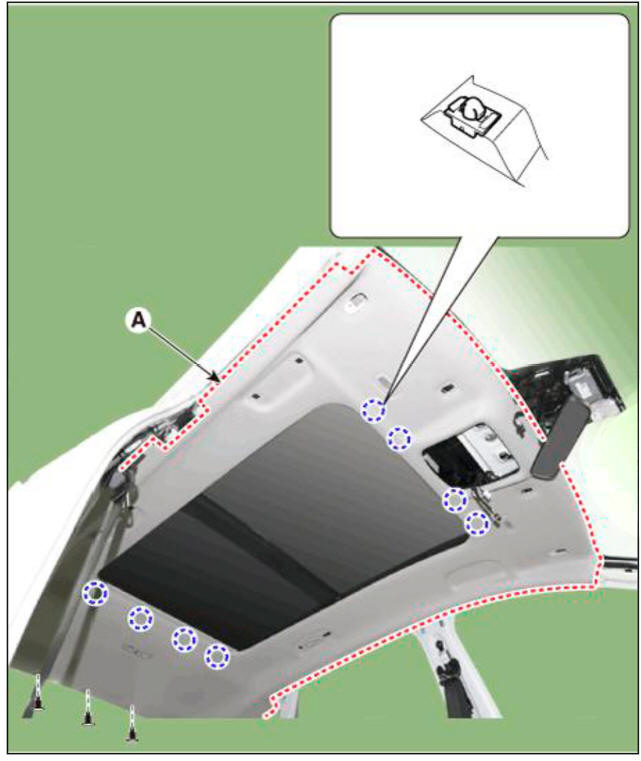
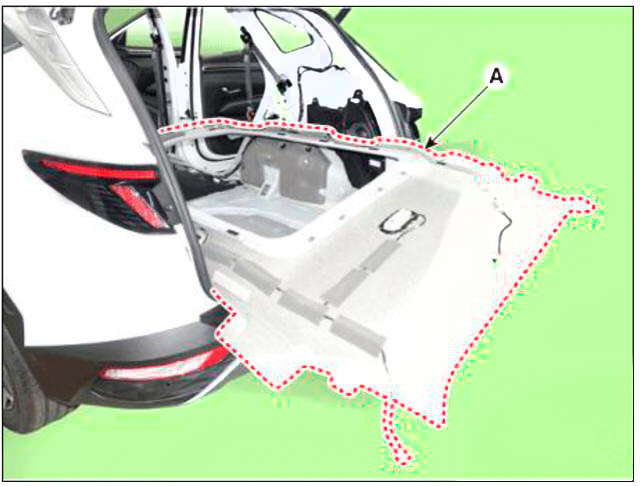
- Remove the roof trim mounting clip and remove the roof trim assembly (A).
WARNING
Be care fill not to wrinkle on the roof trim.
- Press the lock pin, separate the roof trim connector (A).
- Remove the roof trim assembly (A) from the vehicle through the tailgate.
- Remove roof trim wiring harness (A) from the roof trim (B).
WARNING
Take care not to damage the roof trim wiring harness (A) when removing.

WARNING
- When installing the roof trim wiring harness (A) on the roof trim, apply the hot melt continuously by using the hot melt gun tool.
- Put anti-noise pad on roof trim to prevent the noise.
- To install, reverse removal procedure.
WARNING
- Make sure the connector is connected in properly.
- Replace any damaged clips.
READ NEXT:
 Interior Trim
Components
Cowl side trim LH
Cowl side trim RH
Front pillar trim
Center pillar upper trim
Front door scuff trim
Center pillar lower trim
Rear door scuff trim
Rear pillar trim
Door scuff trim
Front door scuff trim
Rear door scuff trim
Replacement
Front door scuff trim
WARNING
When removing with a flat-tip screwdriver or remover, wrap
protective tape around the tools to
prevent damage to components.
Put on gloves t
Door step trim
Component Location
Front door step trim
Rear door step trim
Replacement
WARNING
When piying with a flat-tip screwdriver, wrap it with
protective tape, and apply protective tape
around the related parts, to prevent damage.
Put
SEE MORE:
Tires_Wheels- Removal
Remove the rear wheel and tire (A).
WARNING
Be careful not to damage the hub bolts when removing the rear wheel and
tire (A).
Front
Rear
Installation
Install the rear wheel and tire (A).
Front
Rear
Tighten the hub nuts
Power liftgate
The power liftgate open/close button
automatically opens and closes the
liftgate.
Before using the power liftgate
The power liftgate operates when the
gear is in P (Park) with the Engine Start/
Stop button in the ON position. However,
the lift
Information
- Home
- Hyundai Tucson - Fourth generation (NX4) - (2020-2023) - Owner's Manual
- Hyundai Tucson - Fourth generation (NX4) - (2020-2023) - Workshop Manual
