Hyundai Tucson: Rear console cover
Component Location
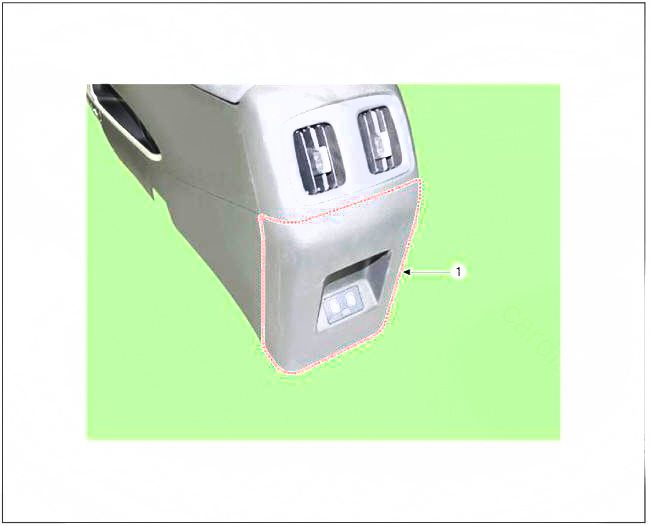
- Rear console cover
Replacement
WARNING
- When removing with a flat-tip screwdriver or remover, wrap protective tape around the tools to prevent damage to components.
- Put on gloves to prevent hand injuries.
WARNING
Take care not to bend or scratch the trim and panels.
- Remove the floor console assembly.
(Refer to Floor Console - "Floor Console Assembly")
- Loosen the mounting screws, disconnect the rear console cover connector (A).
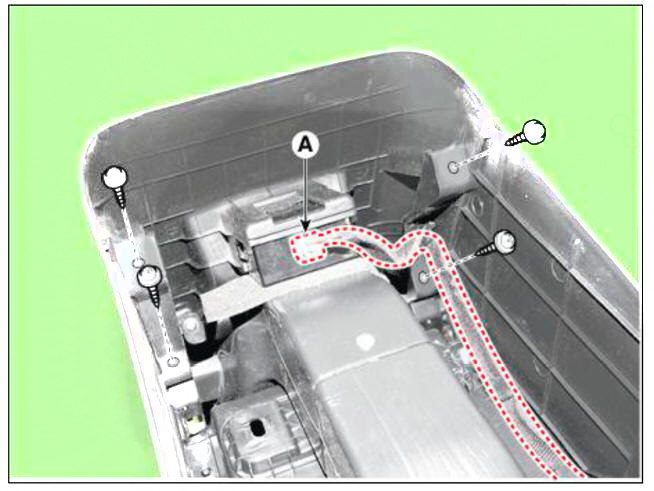
- Remove the rear console cover (A).
- To install, reverse removal procedure.
WARNING
- Make sure the connector is connected properly.
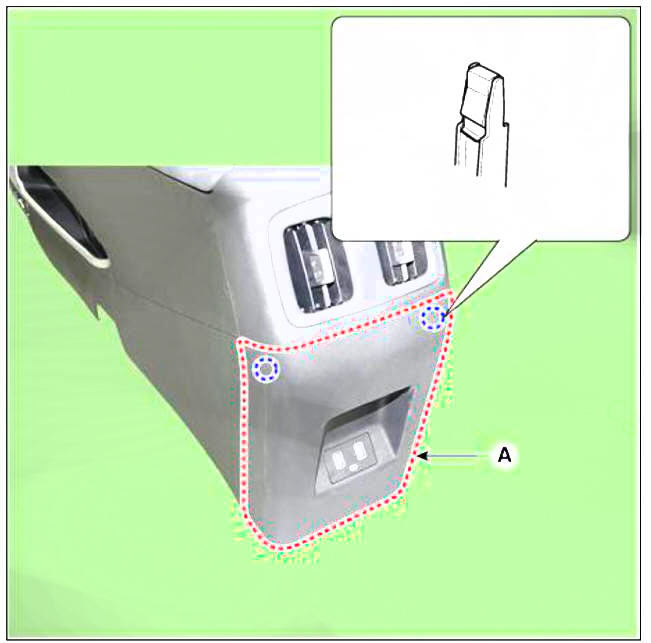
- Replace any damaged clips (or pin-type retainers).
READ NEXT:
 Console armrest
Component Location
Console armrest
Replacement
WARNING
When removing with a flat-tip screwdriver or remover, wrap
protective tape around the tools to
prevent damage to components.
Put on gloves to prevent hand injuries.
WARN
Crash Pad
Components
Crash pad side cover LH
Crash pad lower panel
Crash pad assembly
Crash pad side cover RH
Supervision cluster
Component Location
Cluster fascia panel
General cluster
Cluster fascia panel
Replacement
WARNING
When removing with a flat-tip screwdriver or remover, wrap
protective tape around the tools to
prevent damage to components.
SEE MORE:
Electrical Circuit Inspection Procedure
Check Open Circuit
Procedures for Open Circuit
Continuity Check
Voltage Check
If an open circuit occurs (as seen in FIG. 1), it can be found by
performing Step 2 (Continuity Check Method) or Step 3
(Voltage Check Method) as sho
Windshield Wiper Washer
Component Location
Windshield wiper arm & blade
Wiper & washer switch
Windshield washer hose & nozzle
Windshield wiper motor & linkage
Washer motor
Washer reservoir
Front wiper relay (Engine room junction block)
Information
- Home
- Hyundai Tucson - Fourth generation (NX4) - (2020-2023) - Owner's Manual
- Hyundai Tucson - Fourth generation (NX4) - (2020-2023) - Workshop Manual
