Hyundai Tucson: Rear bumper assembly
Hyundai Tucson - Fourth generation (NX4) - (2020-2023) - Workshop Manual / Body (Interior and Exterior) / Rear Bumper / Rear bumper assembly
Component Location
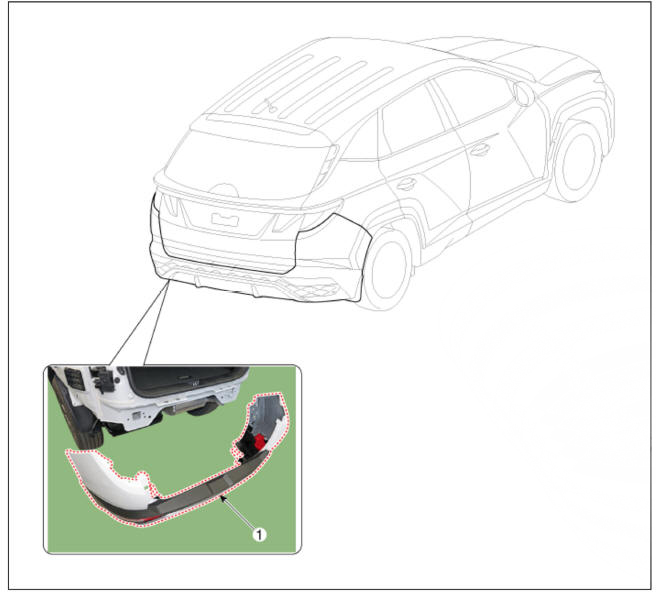
- Rear bumper assembly
Replacement
WARNING
- When removing with a flat-tip screwdriver or remover, wrap protective tape around the tools to prevent damage to components.
- Put on gloves to prevent hand injuries.
WARNING
Take care not to bend or scratch the bumper cover and panels.
- Disconnect the negative (-) battery terminal.
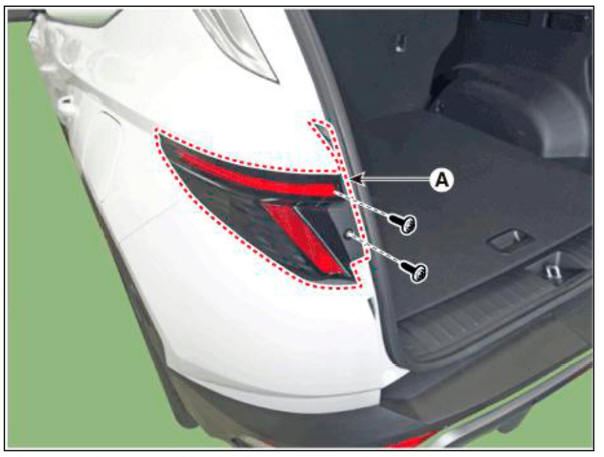
- Loosen the mounting screws and then remove the rear combination lamp (A).
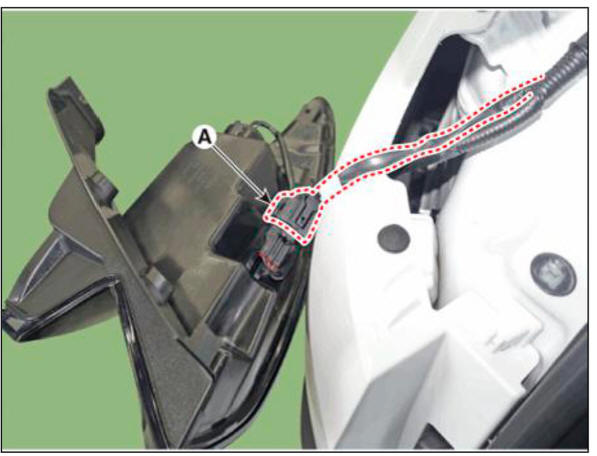
- Disconnect the rear combination lamp connector (A).
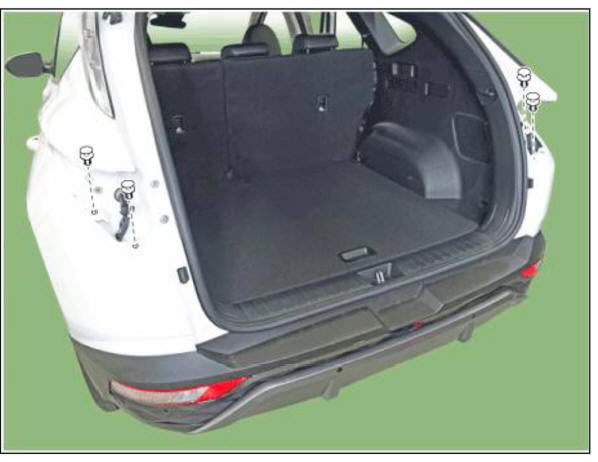
- Loosen the rear bumper upper mounting clips.
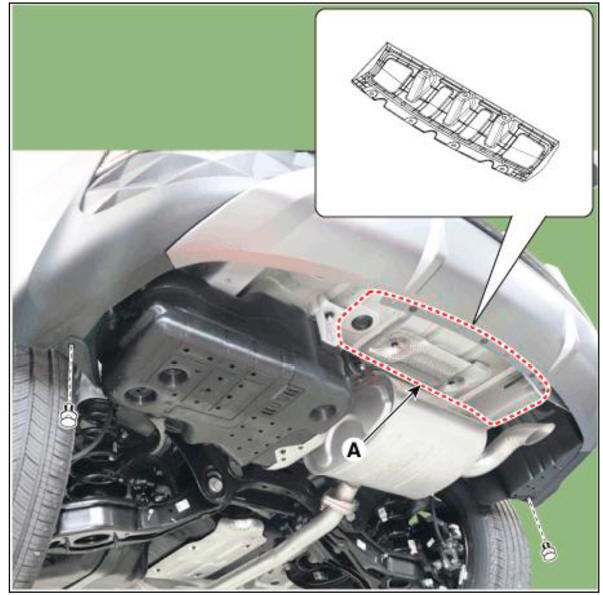
- Loosen the mounting clips, remove the rear bumper under cover (A) and lower mounting clips.
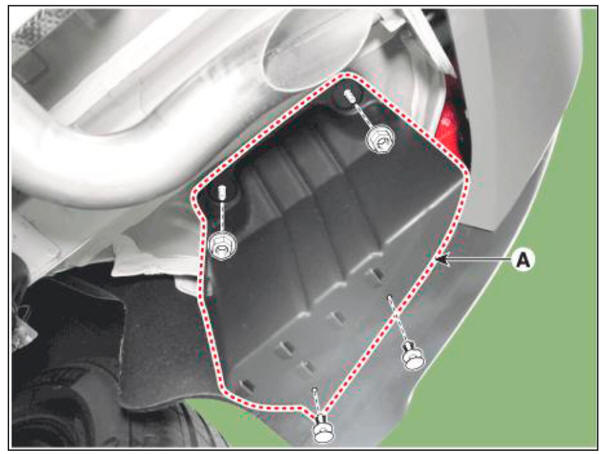
- Loosen the mounting clips, remove the rear bumper side under cover (A).
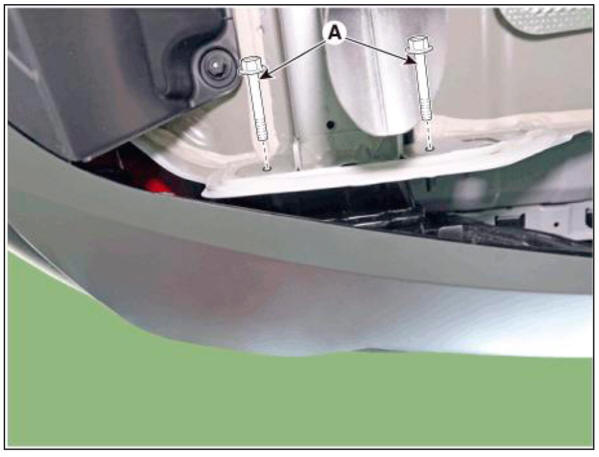
- Loosen the rear bumper assembly mounting bolts (A).
Tightening torque : 20.9 - 29.9 N.m (2.1 - 3.1 kgf.m, 15.4 - 22.1 lb-ft)
LH

RH
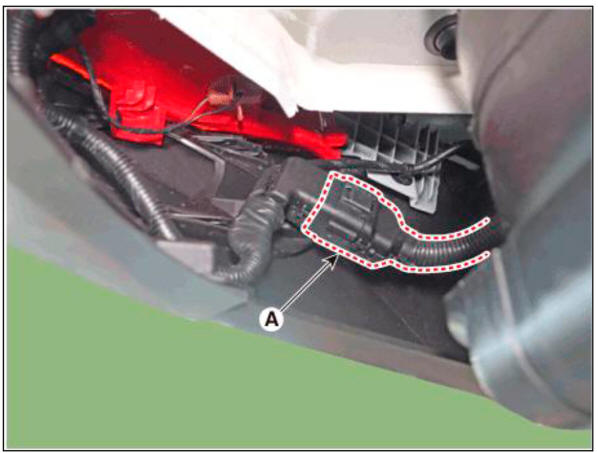
- Disconnect the rear bumper main connector (A).
- Remove the quater garnish (A).
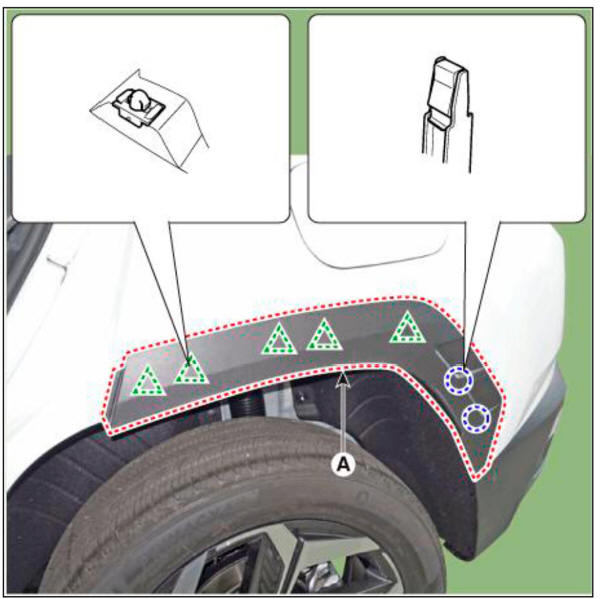
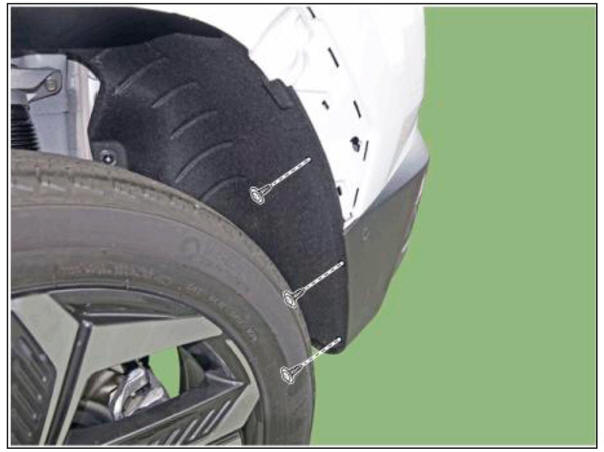
- Loosen the mounting screws and retainer on the side of rear bumper (A), detach the side part of rear bumper.
WARNING
Be careful not to damage the tabs on the side part of rear bumper.
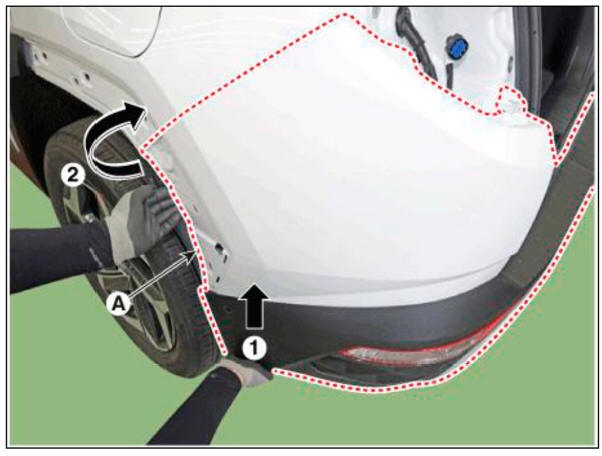
- Remove the rear bumper assembly (A).
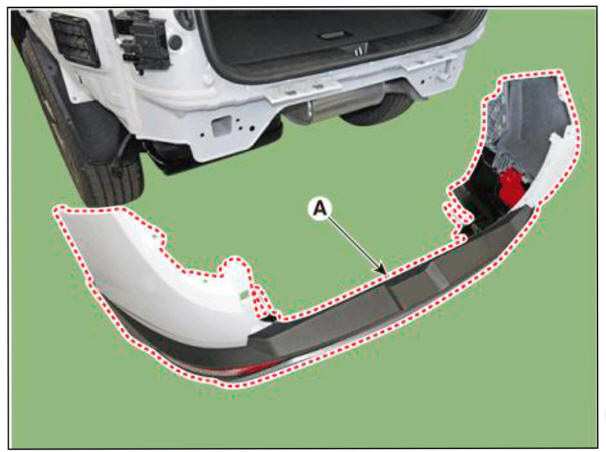
- To install, reverse removal procedure.
WARNING
- Make sure the connector is plugged in properly.
- Replace any damaged clips (orpin-type retainers).
READ NEXT:
 Rear bumper beam assembly
Component
Location
Rear bumper beam assembly
Replacement
WARNING
When removing with a flat-tip screwdriver or remover, wrap
protective tape around the tools to
prevent damage to components.
Put on gloves to prevent hand injuri
 Front seat assembly
Component Location
Front seat assembly
Replacement
Disconnect the negative (-) battery terminal.
Open the cover and loosen the front seat mounting bolts.
Front
Tightening torque :
49.0 - 63.7 N.m (5.0 - 6.5 kgf.m, 36.2 - 47.0 lb
SEE MORE:
 Starter Brush Holder Test
Check that there is no continuity between the (+) brush holder (A) and
(-) plate (B). If there is continuity,
replace the brush holder assembly.
Inspect Overrunning Clutch
Slide the overrunning clutch along the shaft.
Replace i
 System operation
Front camera operating speed by each system :
The operating conditions of the front camera are as follows when the USM of
the following system is ON and the required operating speed is satisfied.
FCA, Forward Collision-Avoidance Assist
Information
- Home
- Hyundai Tucson - Fourth generation (NX4) - (2020-2023) - Owner's Manual
- Hyundai Tucson - Fourth generation (NX4) - (2020-2023) - Workshop Manual