Hyundai Tucson: Parking Brake Pedal Stroke
Hyundai Tucson - Fourth generation (NX4) - (2020-2023) - Workshop Manual / Brake System / Parking Brake System / Parking Brake Pedal Stroke
Adjustment
WARNING
After disassembling/assembling the caliper body or replacing the caliper, parking brake cable or brake disc, re-adjust the parking brake.
- To fit the cable, follow one of these procedures.
- Apply a parking brake fully more than 3 times
- With full operation, hold the parking brake for 1 to 2 hours.
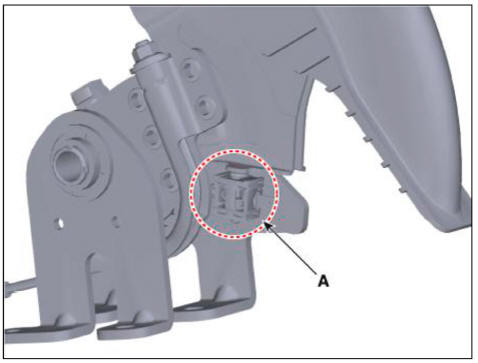
- After fitting the cable, adjust the adjustment nut so that the stroke is 5 - 6 notch when operating the pedal at 30kgf.
WARNING
For the BIR type, adjust the adjustment nut of the lever assembly so
that the sum of the O / P lever on
the rear caliper side and the stopper (LH / RH) angle is within 3.0 mm (0.11
in). 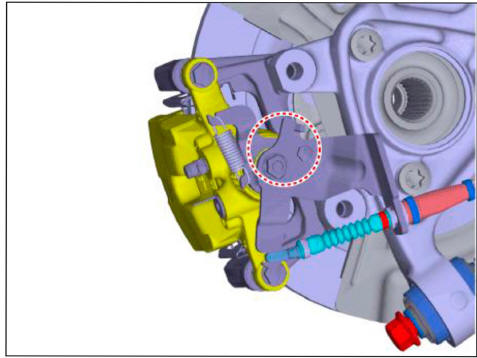
- Make sure that there is no gap between adjustment nut and clip after adjusting the parking brake.
- Make sure that the brakes are not drag.
- Check whether the wheel operates smoothly.
- Perform driving test.
Removal
- Disconnect the negative (-) battery cable.
- Release the parking brake.
- Remove the floor console assembly.
(Refer to Body - "Floor Console Assembly")
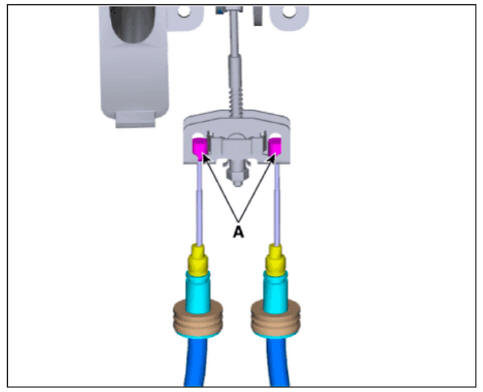
- Remove the cable retainer and remove the parking brake cable (A).
- Disconnect the parking brake switch connector (A).
- Remove the parking brake lever assembly (A) after loosening the bolts.
Tightening torque : 19.6 - 29.4 N m (2.0 - 3.0 kgfrn, 14.5 - 21.7 lb ft)

Installation
- Install in the reverse order of removal.
- After the installation, check the operation status of the parking brake and brake switch.
Adjustment
READ NEXT:
 Parking Brake Adjustment
WARNING
After disassembling/assembling the caliper body or replacing the
caliper, parking brake cable or brake
disc, re-adjust the parking brake.
Remove the floor console assembly.
(Refer to Body - "Floor Console Assembly")
For
Lever Type
Removal
Disconnect the negative (-) battery cable.
Release the parking brake.
Remove the floor console assembly.
(Refer to Body - "Floor Console Assembly")
Remove the cable retainer and remove the parking brake cable (A).
WAR
Pedal Type
Front cable
Disconnect the (-) batteiy terminal.
Release the parking brake.
Remove the crash pad lower panel.
(Refer to Body - "Crash Pad Lower Panel")
Remove the Integrated Central Control Unit (ICU).
(Refer to Body Elect
SEE MORE:
Clutch actuator assembly - Components
Components
Fork cover
Clutch actuator & TCM assembly
Clutch actuator assembly
O-ring
DCT control module (TCM)
Specification
Removal
Turn ignition switch OFF and disconnect the battery negative (-)
terminal.
Remove
Injector - Description
The GDI injector is similar to a standard injector, but sprays fuel at a much
higher pressure directly
into the combustion chamber and has a swirl disc to get the fuel swirling as it
exits the nozzle. This
aids in atomization of the fuel.
Th
Information
- Home
- Hyundai Tucson - Fourth generation (NX4) - (2020-2023) - Owner's Manual
- Hyundai Tucson - Fourth generation (NX4) - (2020-2023) - Workshop Manual
