Hyundai Tucson: Horn
Component Location
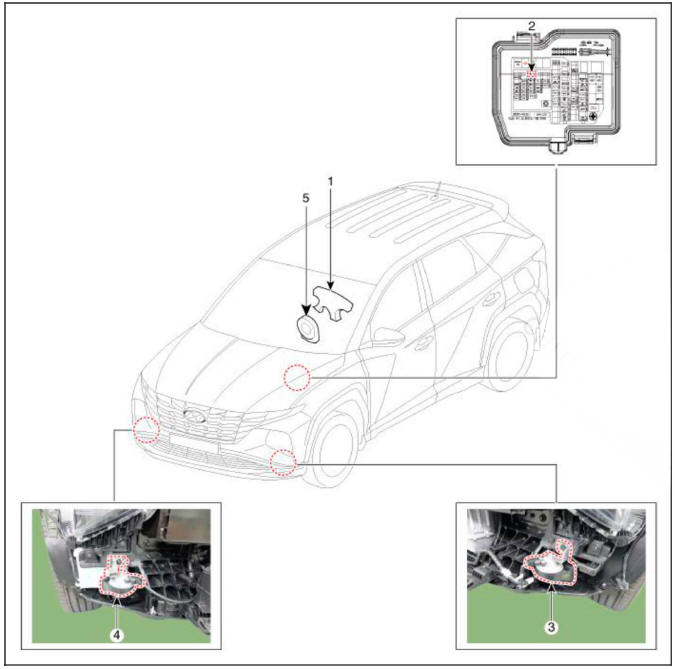
- Horn switch
- Horn relay
- Horn (Low pitch)
- Horn (High pitch)
- Clock spring
Removal
- Remove the front bumper assembly.
(Refer to Body - "Front Bumper Assembly")
- Remove the bolts and disconnect the horn connectors (C), then remove the high pitch horn (B) and low pitch horn (A).
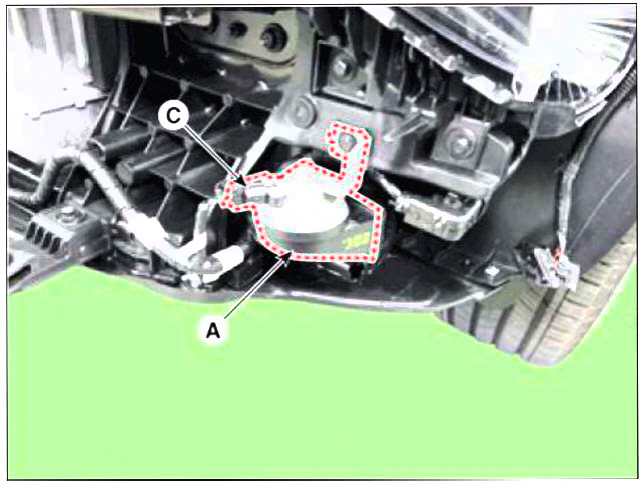
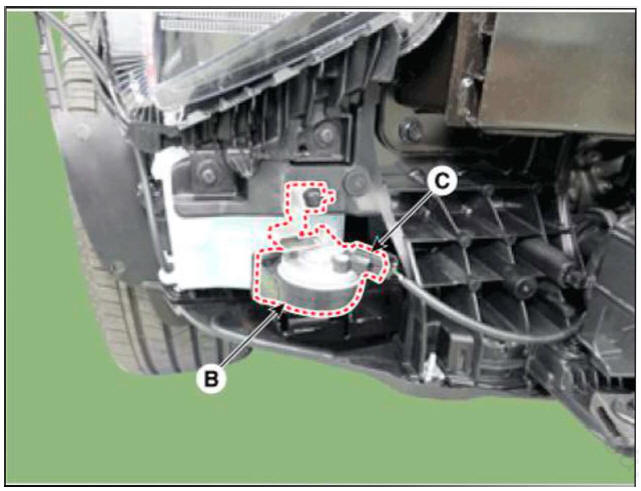
Installation
- Install the horns after connecting the horn connectors.
- Install the front bumper cover.
Inspection
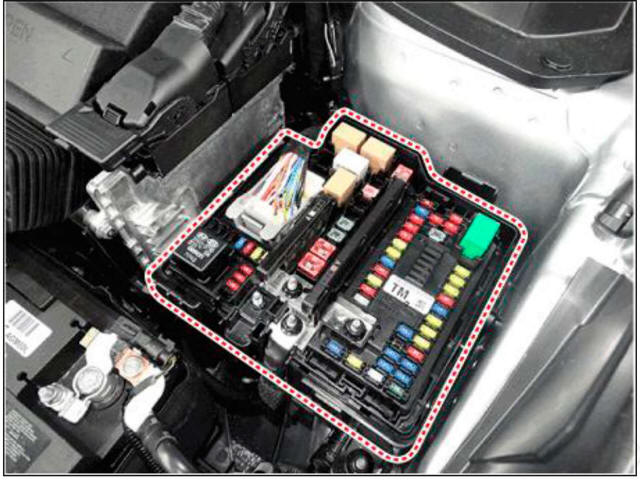
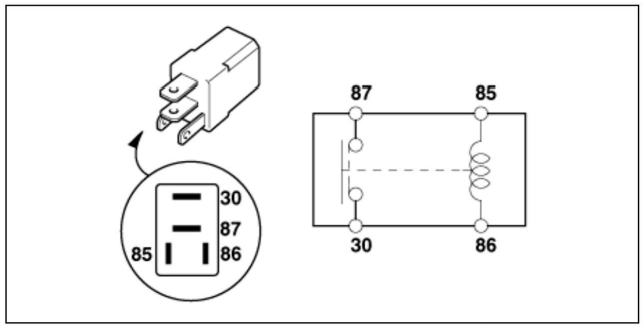
Horn Relay Inspection
- Remove the horn relay (A) from the engine room relay box.
- There should be continuity between the No.30 and No.87 terminals when power and ground are connected to the No.85 and No.86 terminals.
- There should be no continuity between the No.30 and No.87 terminals when power is disconnected.

READ NEXT:
 AVN System
Description
AVN system
The AVN system has improved information search and easiness of manipulation
for the driver by
simplifying the system operation experience and unifying the display of the user
information such as
multimedia and car infor
Emergency Call System
Description
Emergency Call (eCall)
When an accident occurs or the user's request is detected, it notifies the
call center of the vehicle status using the wireless
network so that the center can provide necessary emergency service.
Em
Configuration of eCall Controller
Input button & Indicator
SOS button : Press the button to place a call to the call center.
LED indicator lamp : The red and green LEDs turn on for 3 seconds after the ACC
is on and stay turned off in standby until
the key is turned off
SEE MORE:
Glove box
Component Location
Glove box
Replacement
WARNING
When removing with a flat-tip screwdriver or remover, wrap
protective tape around the tools to
prevent damage to components.
Put on gloves to prevent hand injuries.
WARNING
Tak
Towing service
[A] : Dollies
If emergency towing is necessary,
we recommend having it done by
an authorized HYUNDAI dealer or a
commercial tow-truck service.
Proper lifting and towing procedures
are necessary to prevent damage to
the vehicle. The use o
Information
- Home
- Hyundai Tucson - Fourth generation (NX4) - (2020-2023) - Owner's Manual
- Hyundai Tucson - Fourth generation (NX4) - (2020-2023) - Workshop Manual
