Hyundai Tucson: Glove box
Component Location
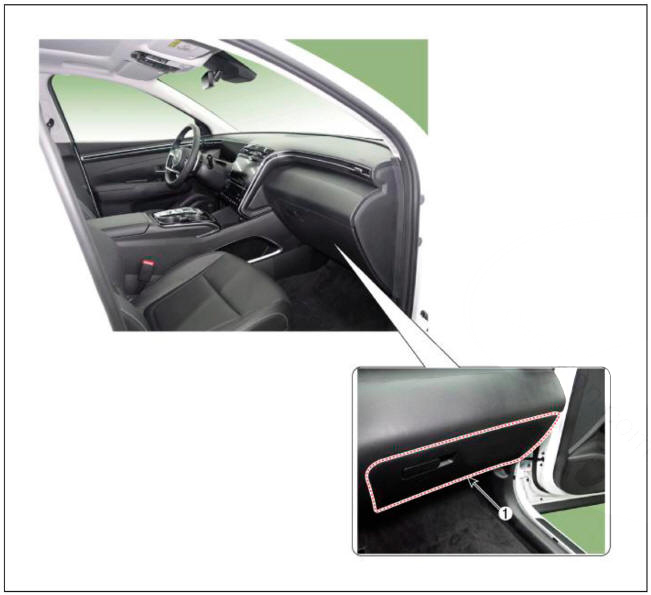
- Glove box
Replacement
WARNING
- When removing with a flat-tip screwdriver or remover, wrap protective tape around the tools to prevent damage to components.
- Put on gloves to prevent hand injuries.
WARNING
Take care not to bend or scratch the trim and panels.
- Open the glove box (A).

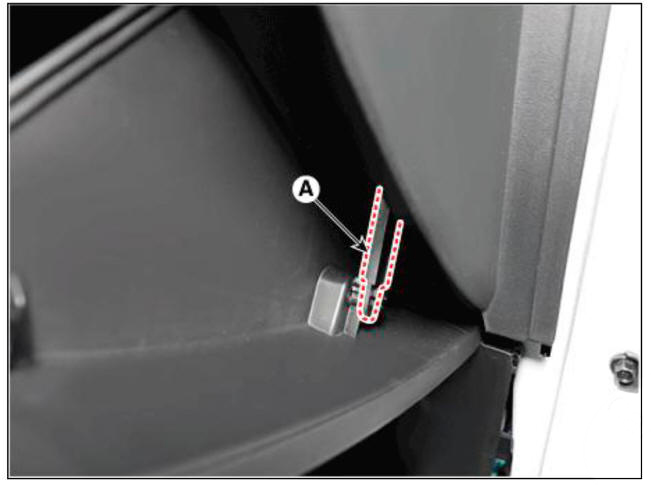
- Remove the air damper (A) from the glove box.
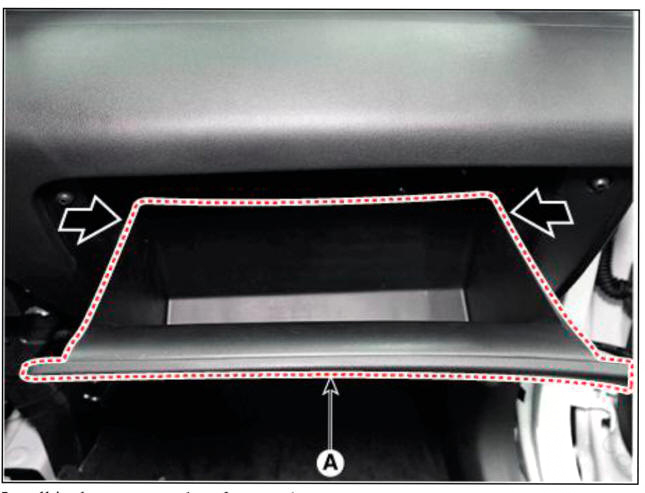
- Press the side of the glove box and remove the glove box (A).
- Install in the reverse order of removal.
WARNING
Replace any damaged clips (or pin - type retainers).
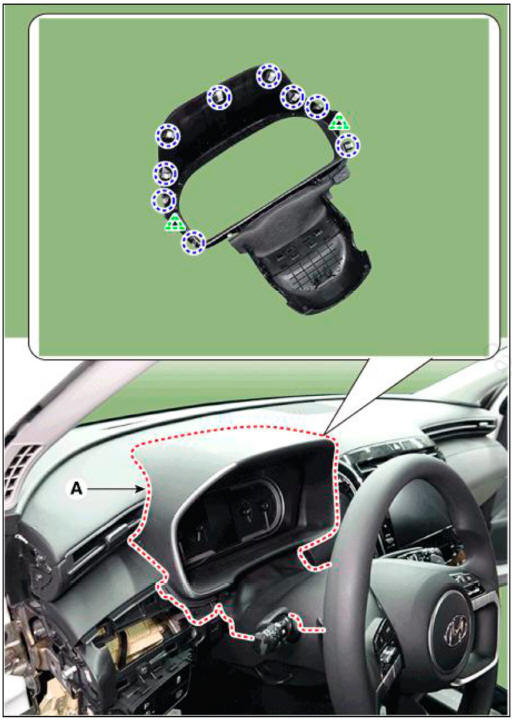
Component Location
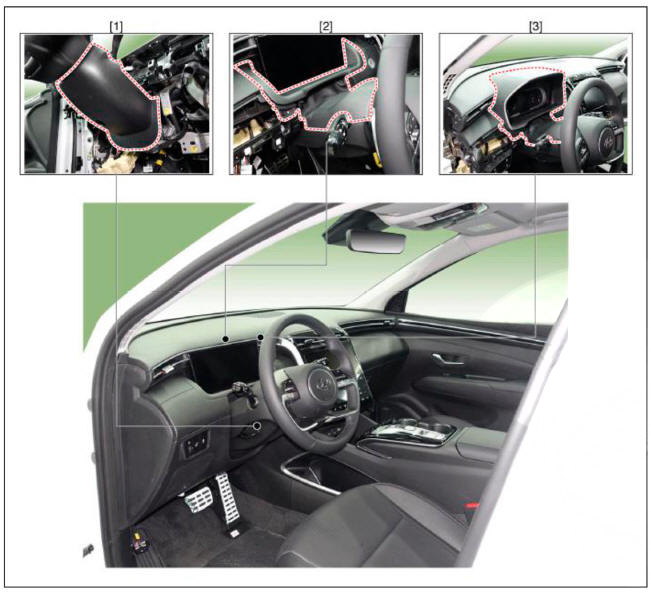
- Steering column shorud lower panel
- Steering column shorud upper panel General cluster
- Steering column shorud upper panel Supervision cluster
Replacement
Steering column shroud upper panel
WARNING
- When removing with a flat-tip screwdriver or remover, wrap protective tape around the tools to prevent damage to components.
- Put on gloves to prevent hand injuries.
WARNING
Take care not to bend or scratch the trim and panels.
- Remove the crash pad garnishLH.
(Refer to Crash Pad - "Crash Pad Garnish")
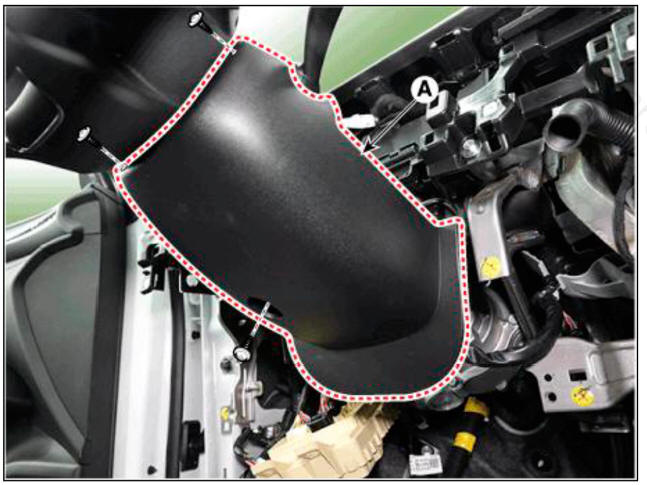
- Loosen the mounting screw, remove the steering column shroud upper panel (A).
Supervision cluster

General cluster
- To install, reverse removal procedure.
WARNING
Replace any damaged clips (or pin-type retainers).
Steering column shroud lower panel
WARNING
- When removing with a flat-tip screwdriver or remover, wrap protective tape around the tools to prevent damage to components.
- Put on gloves to prevent hand injuries.
WARNING
Take care not to bend or scratch the trim and panels.
- Remove the steering column shroud upper panel.
- Remove the crash pad lower panel.
(Refer to Crash Pad - "Crash Pad Lower Panel")
- Loosen the mounting screws by turning the steering wheel to the left and right, and remove the steering column shroud lower panel (A).
- To install, reverse removal procedure.
WARNING
Replace any damaged clips (or pin-type retainers).
READ NEXT:
 Crash pad air vent
Component Location
Crash pad air vent LH
Crash pad air vent RH
Replacement
LH
WARNING
When removing with a flat-tip screwdriver or remover, wrap
protective tape around the tools to
prevent damage to components.
Put on gloves t
Crash pad side cover
Component Location
LH
Crash pad side cover LH
RH
Crash pad side cover RH
Replacement
WARNING
When removing with a flat-tip screwdriver or remover, wrap
protective tape around the tools to
prevent damage to components.
Crash pad center panel
Component Location
Crash pad center panel
Replacement
WARNING
When piying with a flat-tip screwdriver, wrap it with
protective tape, and apply protective tape
around the related parts, to prevent damage.
Put on gloves to protec
SEE MORE:
Engagement bearing - Components
Components
Engagement bearing sleeve
Clutch engagement fork
Engagement bearing 1 (Odd)
Engagement bearing 2 (Even)
Dual clutch assembly
Snap ring
Spline hub
Retaining ring
Removal
Remove the dual clutch transmission from
Mass Air Flow Sensor (MAFS)
Description
MAFS uses a hot-film type sensing element to measure the mass of intake air
entering the engine, and
send the signal to ECM.
A large amount of intake air represents acceleration or high load conditions
while a small amount of
in
Information
- Home
- Hyundai Tucson - Fourth generation (NX4) - (2020-2023) - Owner's Manual
- Hyundai Tucson - Fourth generation (NX4) - (2020-2023) - Workshop Manual
