Hyundai Tucson: Front Brake Caliper
Components
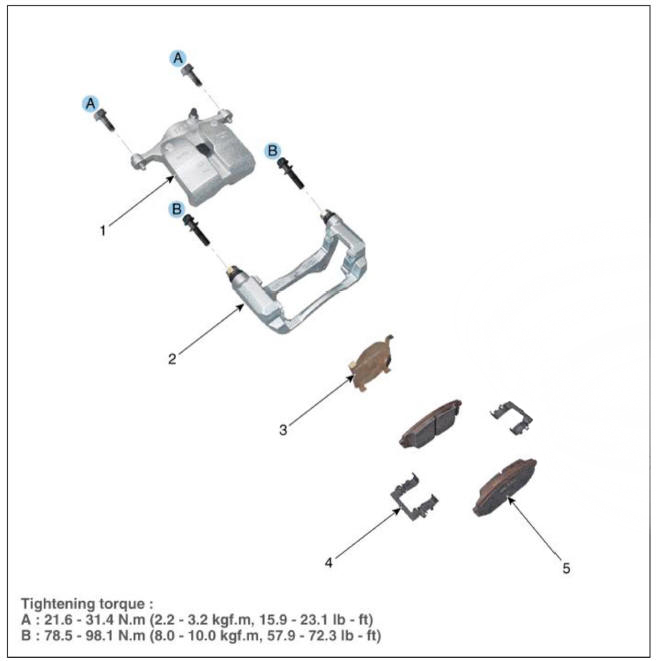
- Caliper body
- Caliper carrier
- Pad inner shim
- Pad retainer
- Brake pad
Removal
- Loosen the wheel nuts slightly.
Raise the vehicle, and make sure it is securely supported.
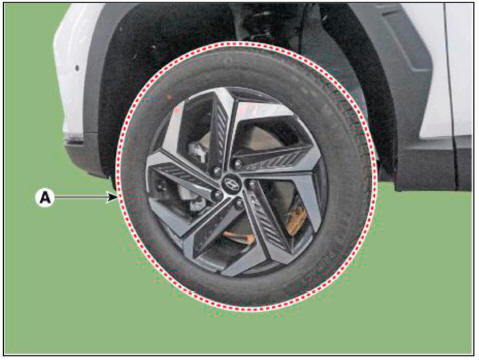
- Remove the front wheel and tire (A) from the front hub.
Tightening torque : 107.9 - 127.5 N.m (11.0-13.0 kgf.m, 79.6 - 94.0 lb-ft)
WARNING
Be careful not to damage the hub bolts when removing the front wheel and tire (A).
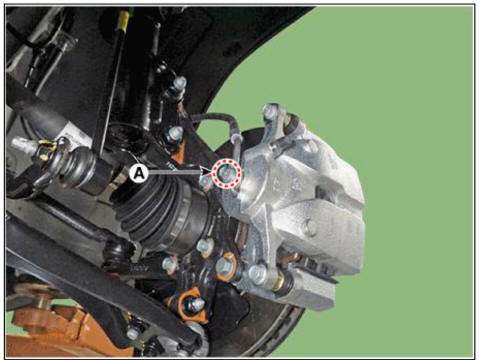
- Loosen the brake hose bolt (A) from the caliper seperate the brake hose.
Tightening torque : 24.5 - 29.4 N.m (2.5 - 3.0 kgf.m, 18.1-21.7 lb-ft)
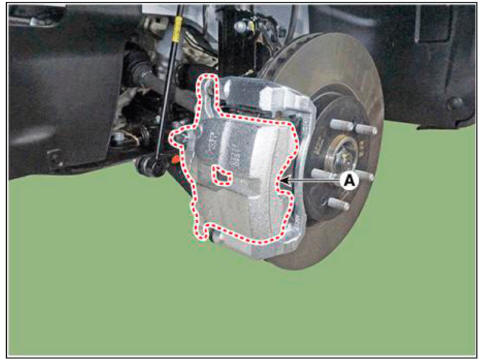
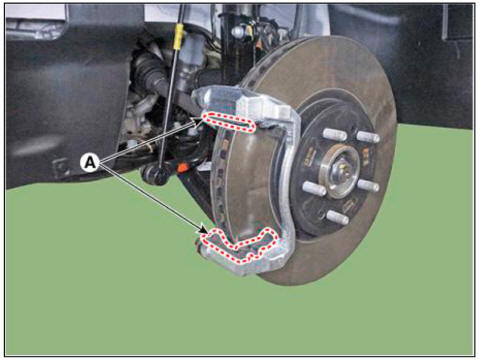
- Remove the caliper body (A) by loosening the guided rod bolt.
Tightening torque : 21.6-31.4 N.m (2.2 - 3.2 kgf.m, 15.9 - 23.1 lb-ft)
- Remove the brake pad (A).
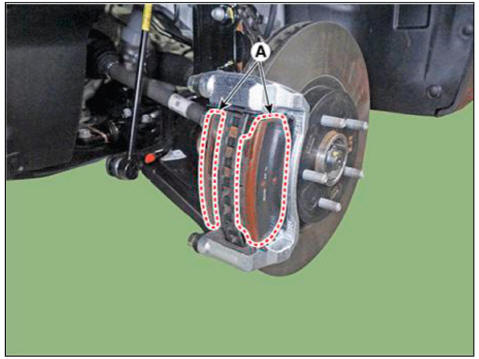
- Remove the pad pad liner (A)
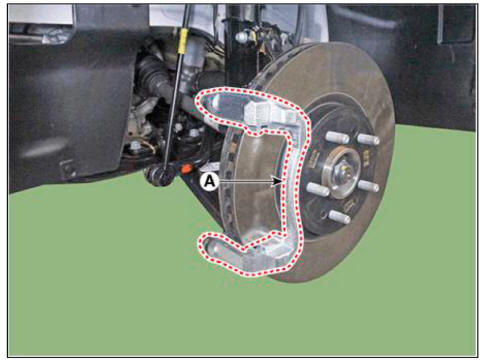
- Remove the caliper carrier (A) by loosening the caliper mouniting bolts.
Tightening torque : 98.1 - 117.7 N.m (10.0 - 12.0 kgf.m, 72.3 - 86.8 lb-ft)
- Remove the front brake disc (A) by loosening the screws.
Tightening torque : 4.9 - 5.8 N.m (0.5 - 0.6 kgf.m, 3.6 - 4.3 lb-ft)

READ NEXT:
 Front Brake Disc
Front Brake Disc Thickness Check
Inspection
Check the brake pads for wear and fade.
Check the brake disc for damage and cracks.
Remove all rust and contamination from the surface, and measure the disc
thickness at 24 points, at leas
Rear Brake Caliper
Components
EPB Actuator
Caliper body
Caliper carrier
Pad retainer
Brake pad
Removal
Before removing the rear caliper, perform "Brake Pad Replacement Mode"
using the self-diagnosis.
Raise the vehicle, and make sur
Rear Brake Disc
Rear Brake Disc Thickness Check
Inspection
Check the brake disc for damage and cracks.
Remove all rust and contamination from the surface, and measure the disc
thickness at 24 points, at least, of same distance
(5mm) from the brake
SEE MORE:
CCWD Actuator- Installation
WARNING
When installing the CVVD actuator the shaft gear do not fit
properly, rotate the C W D actuator in both directions and
installing it uaturally.
(Do not impact when installating the component.)
Do not damage to the component whe
Driving your vehicle
WARNING
Carbon monoxide (CO) gas is toxic. Breathing CO can cause unconsciousness
and
death.
Engine exhaust contains carbon monoxide which cannot be seen or smelled.
Do not inhale engine exhaust.
If at any time you smell engine exhaust inside
Information
- Home
- Hyundai Tucson - Fourth generation (NX4) - (2020-2023) - Owner's Manual
- Hyundai Tucson - Fourth generation (NX4) - (2020-2023) - Workshop Manual
