Hyundai Tucson: Compressor - Disassembly
Disassembly
- Remove the front tire RH.
(Refer to Suspension System - "Wheel")
- Loosen the drive belt.
(Refer to Engine Mechanical System - "Drive Belt")
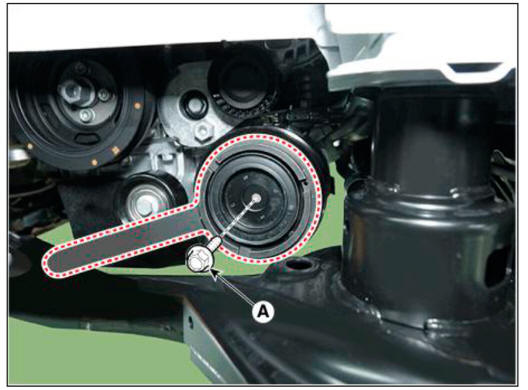
- Remove the clutch bolt (A) while holding the pulley with a clutch bolt remover (09977-3R000).
Tightening torque : 15.0 - 21.0 N.m (1.53 -2.14 kgf.m, 11.1 - 15.5 lb-ft)
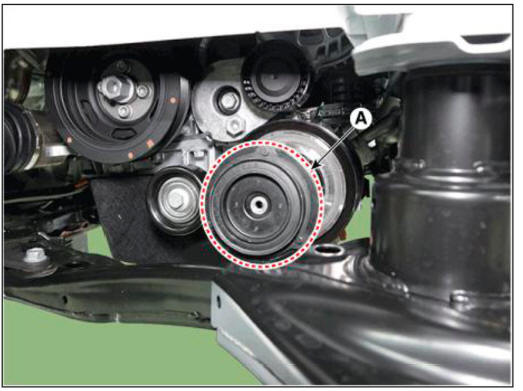
- Remove the Disc & Hub assembly (A).
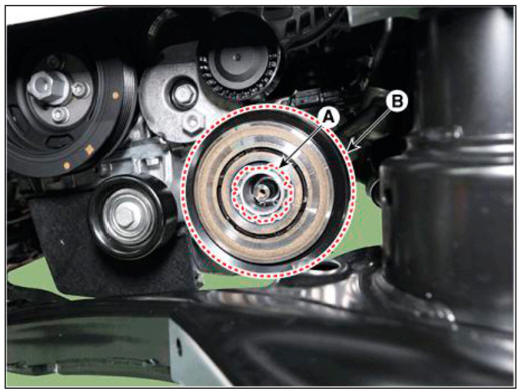
- Remove the pulley (B) after removing the snap ring (A) with a snap ring plier.
WARNING
- Be careful not to damage the pulley and compressor during disassembly/reassembly.
- Once the snap ring is removed, replace it with a new one.
- Reassemble in the reverse order of disassembly
WARNING
- Clean the pulley and compressor sliding surfaces with non-petroleum solvent.
- Install a new snap ring, and make sure they are fully seated in the groove.
- Make sure that the pulley turns smoothly after reassembly.
READ NEXT:
 Condensor
Components Location
Condensor
Inspection
Check the condenser fins for clogging and damage. If clogged, clean them
with water, and blow them with compressed air. If
bent, gently bend them using a screwdriver or pliers.
Check the co
Condensor - Replacement
Remove the condensor.
(Refer to Air conditioning System - "Condensor")
Using a Lwrench, remove the cap (A) on the bottom of the receiver-drier.
Remove the receiver-drier (A) from condenser using a long nose plier.
Check
Condensor - Inspection
WARNING
Before measuring the pressure of the refriferant line, check whether
the refrigerant amount is charged in
accordance with the specified charging amount.
(Refer to Heating, Ventilation, Air Conditioning - "Specifications")
SEE MORE:
Inspection with Diagnostic Tools
In the eCall system, failure can be quickly diagnosed by using the vehicle
diagnostic system.
The diagnostic system provides the following information.
1) Self diagnosis : Checking failure and code number (DTC)
2) Current data : Checking the s
Warning Lamp
Activation
Warning Lamp Behavior after Ignition On
As soon as the operating voltage is applied to the SRSCM ignition input, the
SRSCM activates the
warning lamp for a LED lamp check.
The lamp shall turn on for 6 seconds during the initialization phase an
Information
- Home
- Hyundai Tucson - Fourth generation (NX4) - (2020-2023) - Owner's Manual
- Hyundai Tucson - Fourth generation (NX4) - (2020-2023) - Workshop Manual
