Hyundai Tucson: Camshaft - Inspection
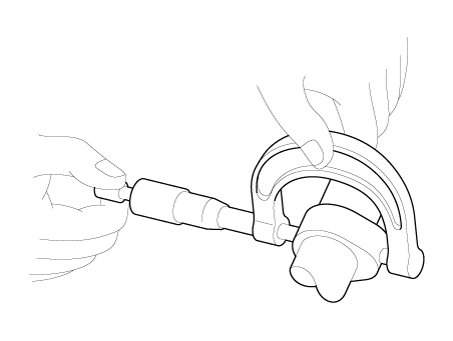
- Measure the height of the cam.
Check the surface of the cam lob for wear and tear. If necessary, replace the camshaft.
Cam height
Intake : 37.33 mm (1.4697 in.)
Exhaust : 37.44 mm (1.474 in.)
- Inspect the camshaft journal clearance.
(1) Clean the camshaft journals and bearing caps.
(2) Place the camshafts on the cam carrier.
(3) Lay a strip of plasticgauge across each of the camshaft journals.

(4) Install the camshaft front bearing cap (A) and camshaft bearing caps (B).

1) Install the camshaft front bearing cap and camshaft bearing cap installing bolt with direction from back of engine to the front of engine according to the procedure at down below.
Tightening torque : 4.9 - 6.9 N.m (0.5 - 0.7 kgf.m, 3.6 - 5.1 lb-ft)

2) Install the camshaft bearing cap installing bolt with direction from back of engine to the front of engine according to the procedure at down below.
Tightening torque : 4.9 - 6.9 N.m (0.5 - 0.7 kgf.m, 3.6 - 5.1 lb-ft)

3) Install the camshaft bearing cap installing bolt with direction from back of engine to the front of engine according to the procedure at down below.
Tightening torque : 4.9 - 6.9 N.m (0.5 - 0.7 kgf.m, 3.6 - 5.1 lb-ft)

4) Install the camshaft front bearing cap and camshaft bearing cap installing bolt with direction from back of engine to the front of engine according to the procedure at down below.
Tightening torque : 9.8 - 11.8 N.m (1.0 - 1.2 kgf.m, 7.2 - 8.7 lb-ft)

5) Install the camshaft front bearing cap and camshaft bearing cap installing bolt with direction from back of engine to the front of engine according to the procedure at down below.
Tightening torque : 18.6 - 22.6 N.m (1.9 - 2.3 kgf.m, 13.7 - 16.6 lb-ft)

6) Install the camshaft bearing cap installing bolt with direction from back of engine to the front of engine according to the procedure at down below.
Tightening torque : 11.8 - 13.7 N.m (1.2 - 1.4 kgf.m, 8.7 - 10.1 lb-ft)

7) Install the camshaft bearing cap installing bolt with direction from back of engine to the front of engine according to the procedure at down below.
Tightening torque : 11.8 - 13.7 N.m (1.2 - 1.4 kgf.m, 8.7 - 10.1 lb-ft)

(5) Remove the camshaft bearing caps.
(6) Measure the plasticgauge at the widest point.
If the oil clearance is greater than the specification, replace the camshaft.
If necessary, replace the bearing caps and cam carrier.
Cam height
No.1 : 0.040 - 0.071 mm (0.0016 - 0.0028 in.)
No.2, 3, 4, 5 : 0.035 - 0.065 mm (0.0014 - 0.0026 in.)

(7) Remove the plasticgauge.
(8) Remove the camshafts.
- Inspect the camshaft end play.
(1) Install the camshafts.
(2) Measure the end play while moving the camshaft back and forth using a dial gauge.
Camshaft end play
Standard value : 0.10 - 0.19 mm (0.0039 - 0.0075 in.)

If the end play is greater than the specification, replace the camshaft. If necessary, replace the cylinder head
READ NEXT:
 Camshaft - Installation
Install the intake CVVT (A).
Install the CVVD assembly (A).
WARNING
After installing the CVVD, check whether the swing arm is
separated or is installed correctly.
When installing the intake camshaft, spray the engine oil
Camshaft - Description
CVVD (Continuous Variable Valve Duration) System is a device to control the
optimum open and close timing according to
the driving mode by changing the valve opening section.
It is composed of cam shaft, CVVD assembly, and CVVD acatuator.
Th
When not using the CVVD fixture
(3) Remove the CVVD assembly.
Remove the Intake CVVT (A).
Installation
Install the Intake CVVT (A).
Install the CVVD assembly (A).
WARNING
After installing the CVVD, check whether the swing arm is
separated
SEE MORE:
Rear wheel speed sensor - Inspection
Inspection
Measure the output voltage between the terminal of the wheel speed
sensor and the body ground.
WARNING
In order to protect the wheel speed sensor, when measuring output
voltage, a 100Q resister must be used as shown.
C
Camshaft - Description
CVVD (Continuous Variable Valve Duration) System is a device to control the
optimum open and close timing according to
the driving mode by changing the valve opening section.
It is composed of cam shaft, CVVD assembly, and CVVD acatuator.
Th
Information
- Home
- Hyundai Tucson - Fourth generation (NX4) - (2020-2023) - Owner's Manual
- Hyundai Tucson - Fourth generation (NX4) - (2020-2023) - Workshop Manual
