Hyundai Tucson: Auto defogging actuator
Hyundai Tucson - Fourth generation (NX4) - (2020-2023) - Workshop Manual / Heating, Ventilation and Air Conditioning (HVAC) / Heater / Auto defogging actuator
Components Location
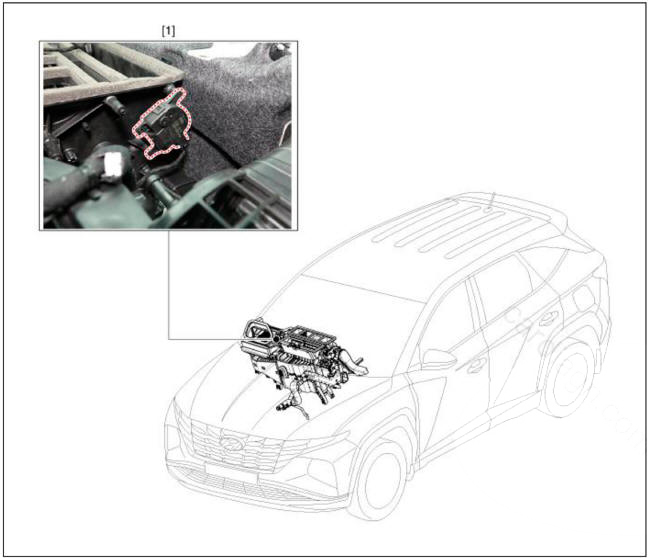
- Auto defogging actuator
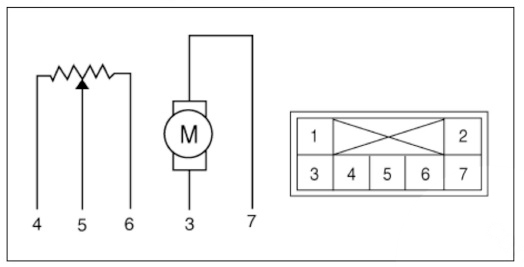
Inspection
- Turn the ignition switch OFF.
- Disconnect the auto defogging connector.
- Verify that the auto defogging actuator operates to the open position when connecting 12V to terminal 3 and grounding terminal 6
Verify that the auto defogging actuator operates to the close position when connected in reverse.
- -
- -
- DEF (Close)
- DEF (Open)
- Sensor (+ 5V)
- Feedback signal
- Sensoer ground
- Connect the auto defogging actuator connector.
- Turn the ignition switch ON.
- Check the voltage between terminals 5 and 4.

* It will feedback the current position of the actuator to controls.
- If the measured voltage is not within specification, check the operation by replacing the existing auto defogging actuator with a new genuine part. After that, determine whether replacement of the auto defogging actuator is required or not.
- Replace the auto defogging actuator if it is proved that there is a problem with it.
Replacement
- Disconnect the negative (-) battery terminal.
- Remove the main crash pad assembly.
(Refer to Body (Interior and Exterior) - "Main Crash Pad Assembly")
- Disconenct the connector (A) and loosen the mounting screws and remove the auto defogging actuator (B).
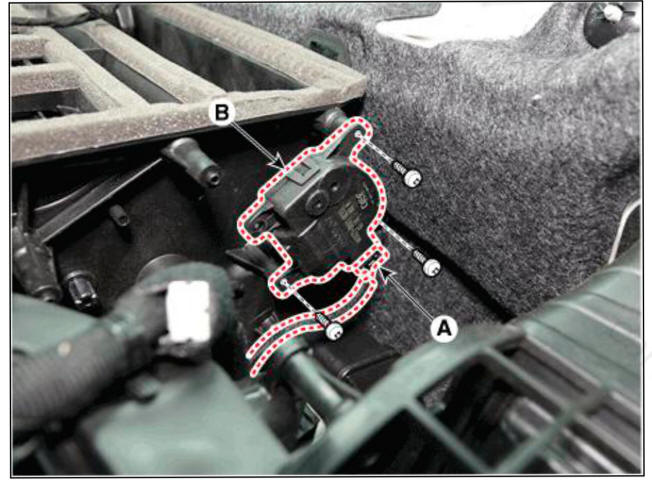
- Install in the reverse order of removal.
READ NEXT:
 Blower unit assembly
Components Location
Blower unit assembly
Components
Blower unit assembly
Intake actuator
Intake duct case LH
Intake seal
Intake door(l)
Intake door(2)
Intake duct case RH
Climate control actuator
PWM blower module
B
Blower - Replacement
Disconnect the negative (-) battery terminal.
Recover the refrigerant with a recovery/recycling/charging station.
(Refer to Air conditioning System - "Repari procedures")
When the engine is cool, drain the engine coolant from the r
SEE MORE:
Clutch Pedal Stroke Sensor
Removal
Turn ignition switch OFF and disconnect the negative (-) battery cable.
Disconnect the clutch pedal stroke sensor connector (A).
Loosen the bolts (A) and then removing the clutch pedal stroke sensor
(B).
Installation
Driver Attention Warning (DAW)
Basic function
Driver Attention Warning will help
determine the driver's attention level by
analyzing driving pattern, driving time,
etc. while vehicle is being driven. Driver
Attention Warning will recommend a
break when the driver's atten
Information
- Home
- Hyundai Tucson - Fourth generation (NX4) - (2020-2023) - Owner's Manual
- Hyundai Tucson - Fourth generation (NX4) - (2020-2023) - Workshop Manual
