Hyundai Tucson: Supplemental Restraint System Control Module (SRSCM)
Hyundai Tucson - Fourth generation (NX4) - (2020-2023) - Workshop Manual / Restraint / SRSCM / Supplemental Restraint System Control Module (SRSCM)
Components Location
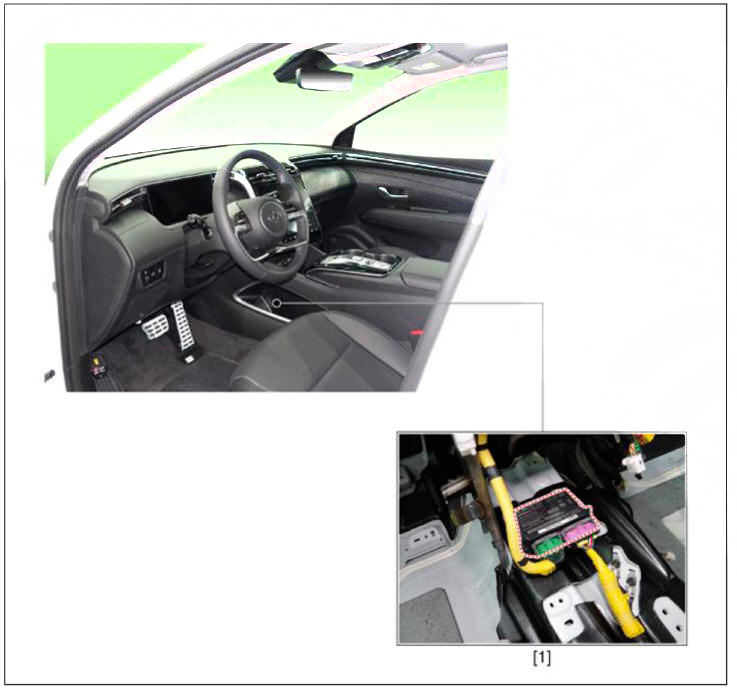
- Supplemental Restraint System Control Module (SRSCM)
Supplemental Restraint System Control Module (SRSCM)
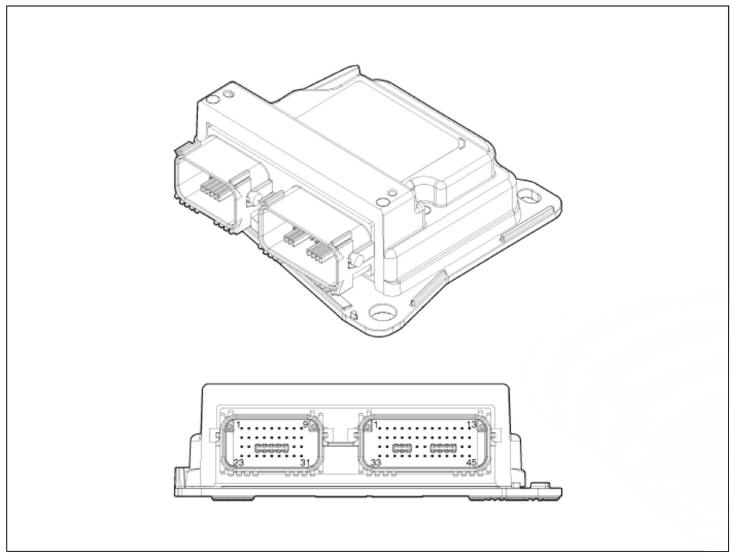
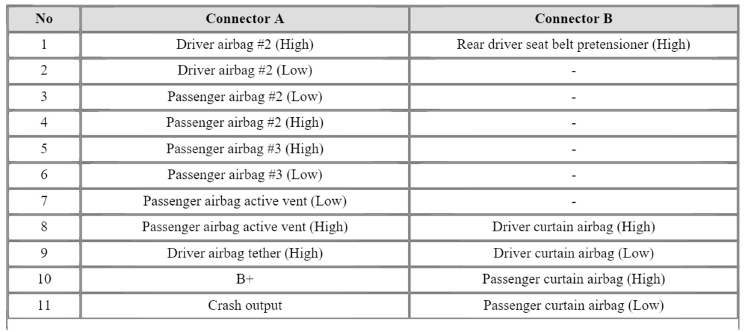
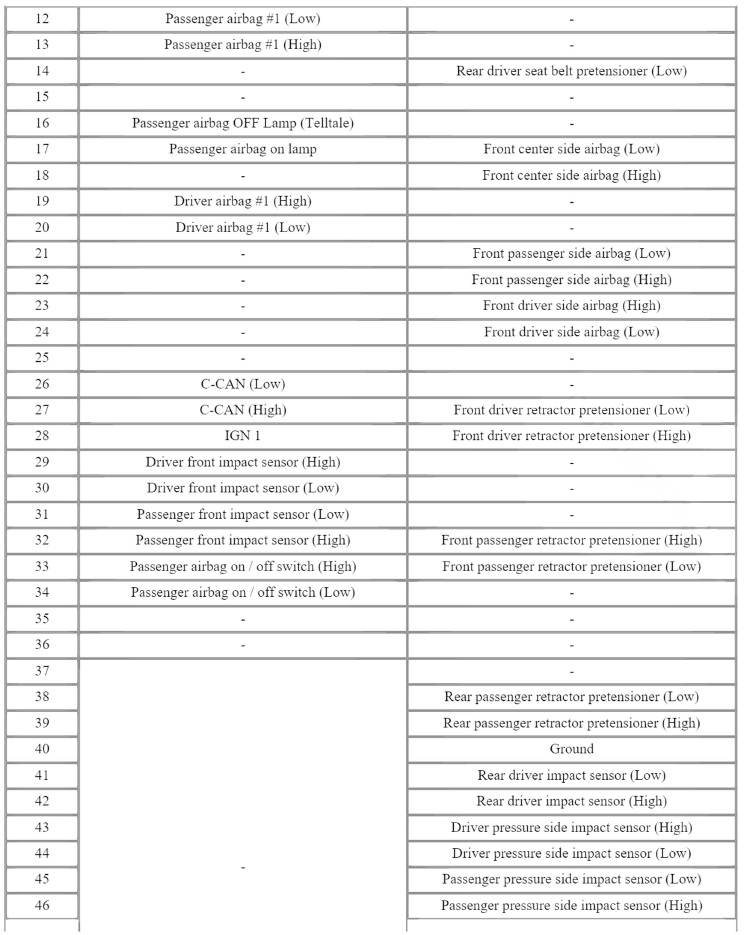

Removal
- Disconnect the battery negative terminal.
WARNING
After disconnecting the cables, wait at least 3 minutes.
- Remove the floor console assembly.
(Refer to Body - "Floor Console Assembly")
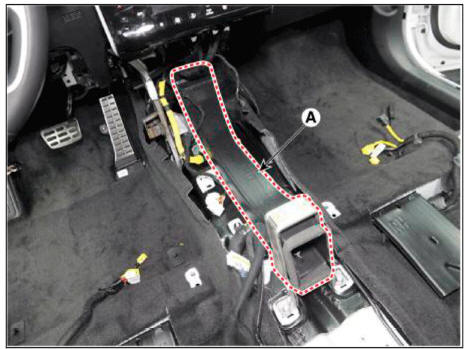
- Remove the rear air duct (A) by removing the mounting bolt.
- Pull up the lock of the SRSCM connector to disconnect the connectors (A).
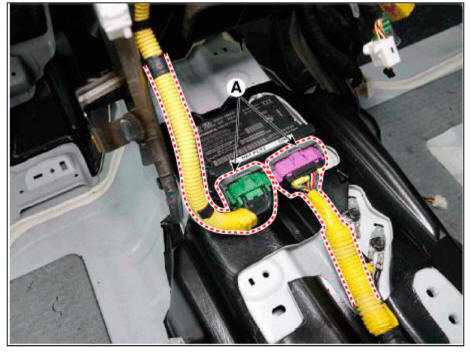
- Remove the SRSCM mounting bolt and nuts, remove the SRSCM (A).
Tightening torque :
Bolt: 10.8 - 13.7 N m (1.1 - 1.4kgf m. 7.9 - 10.1 lbf ft)
Nut: 7.8 - 9.8 N m (0.8 - 1.0 kgfm, 5.8 - 7.2 lb ft)

READ NEXT:
 SRSCM - Installation
Installation
Install in the reverse of the removal.
After installing the SRSCM, confirm proper system operation.
WARNING
SIf the Switch ON the ignition, the SRS indicator light should turn
on for about six seconds and then off.
Variant
 Pressure Side Impact Sensor (P-SIS)
Disconnect the batteiy negative terminal.
WARNING
After disconnecting the cables, wait at least 3 minutes.
Remove the front door trim.
(Refer to Body - "Front Door Trim")
Disconnect the connector (A) from the pressure side im
 PAB ON/OFF Switch
Components Location
PAB ON/OFF Switch
Removal
Disconnect the battery negative terminal.
WARNING
After disconnecting the cables, wait at least 3 minutes.
Remove the crash pad side cover.
(Refer to Body - "Crash Pad Side C
SEE MORE:
 General Information
Specifications
Service Standard
Tightening Torques
Lubricants
Special Service Tools
Troubleshooting
 Input shaft speed sensor
Components
Input shaft speed sensor 1 (Odd)
Input shaft speed sensor 2 (Even)
Specification
Circuit Diagram
Removal
Turn ignition switch OFF and disconnect the negative (-) batteiy cable.
Remove the air cleaner assembly a
Information
- Home
- Hyundai Tucson - Fourth generation (NX4) - (2020-2023) - Owner's Manual
- Hyundai Tucson - Fourth generation (NX4) - (2020-2023) - Workshop Manual