Hyundai Tucson: Rear Brake Pad
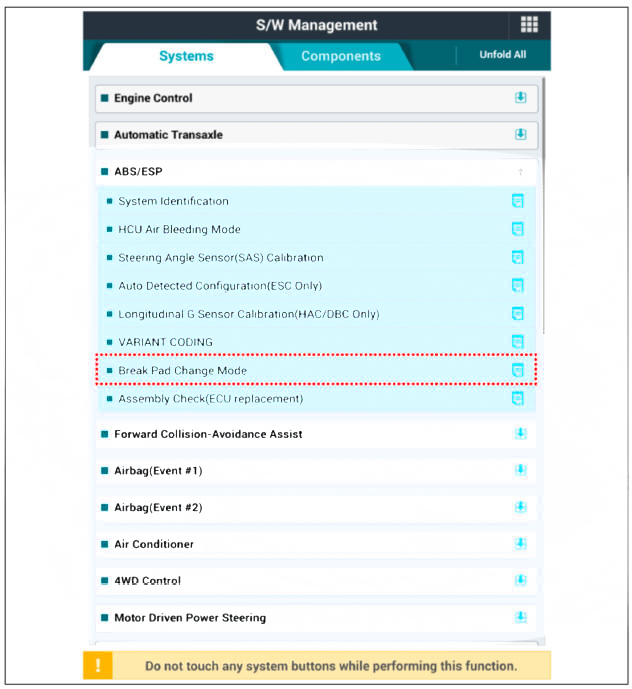
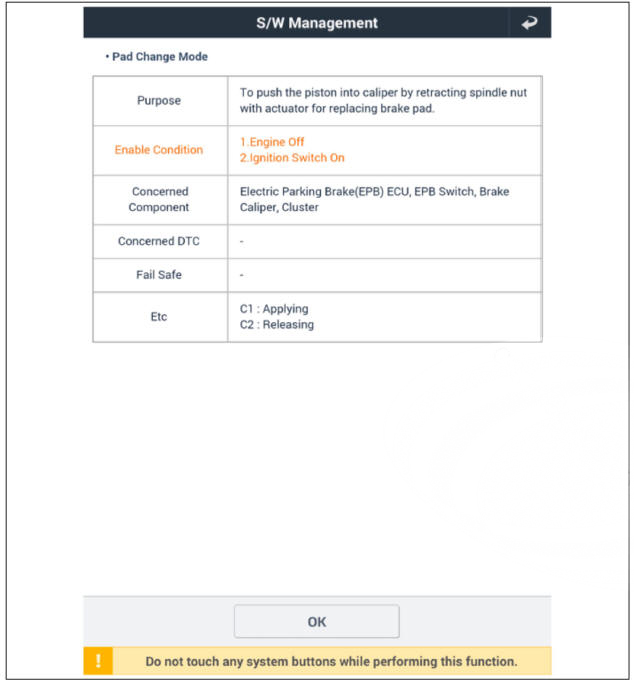
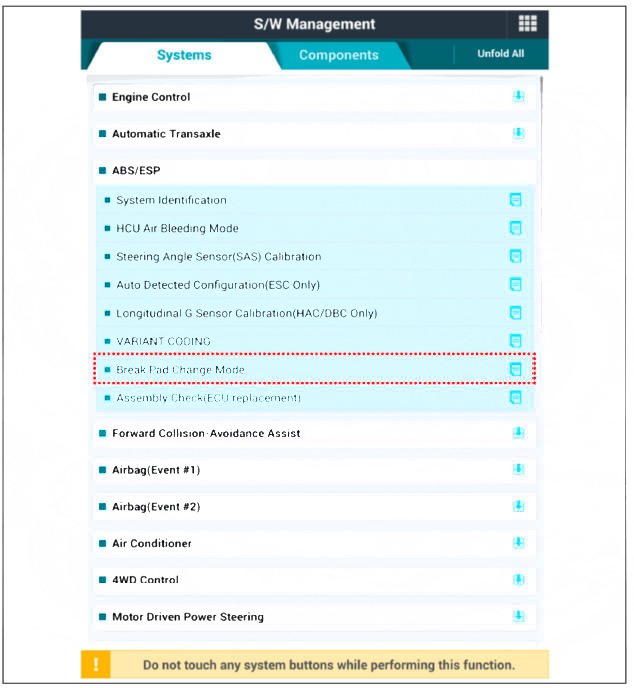
- After installing the rear caliper, perform "Brake Pad Replacement Mode" using the self-diagnosis. EPB Apply
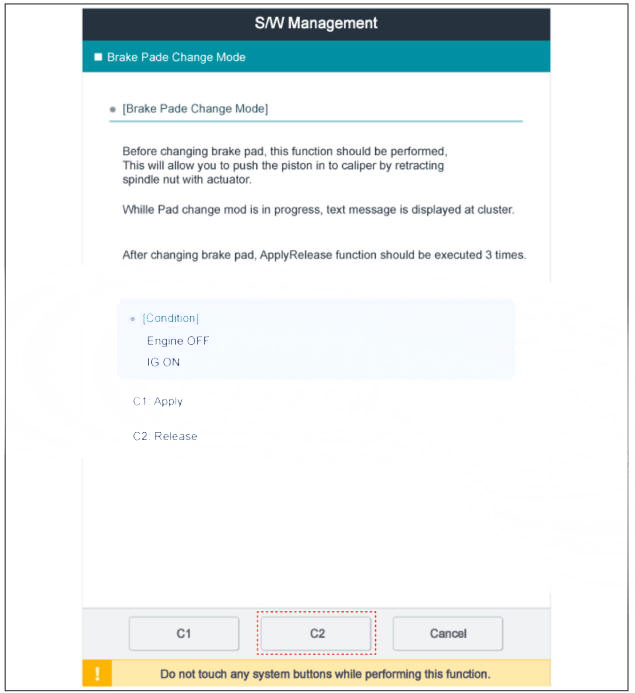
- Select C2 (Release) on the screen below.
- After disassembling/assembling the caliper body or replacing the brake caliper, parking brake cable or brake disc, re-adjust the parking brake.EPB None Apply
- Loosen the wheel nuts slightly.
Raise the vehicle, and make sure it is securely supported.
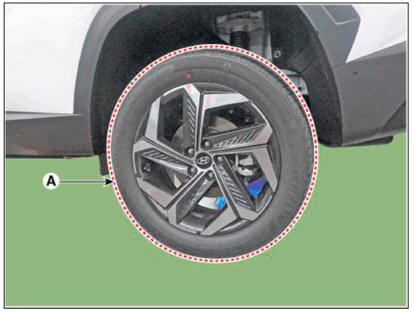
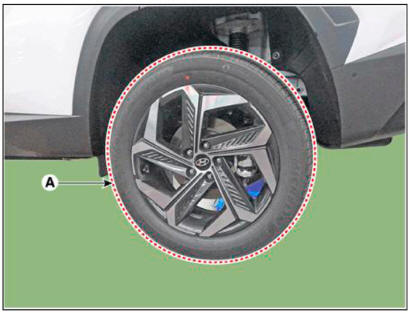
- Remove the rear wheel and tire (A) from the rear hub.
WARNING
Be careful not to damage the hub bolts when removing the rear wheel and tire (A).
- Disconnect the EPB connector or parking brake cable.
- EPB Apply : Disconnect the EPB connector (A).
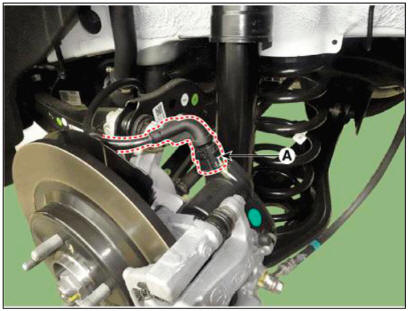
- EPB None Apply : Remove the parking brake cable (A), after removing the clip.
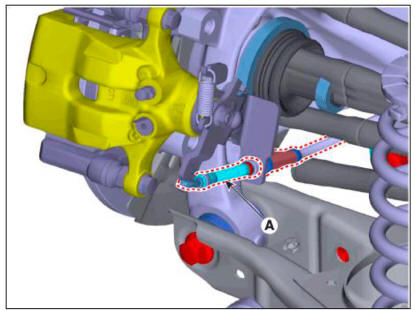
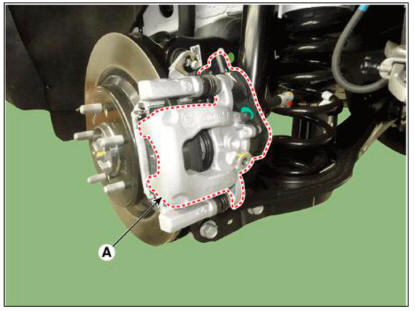
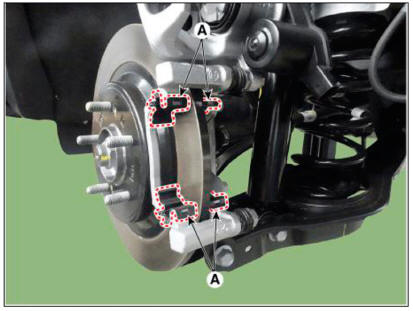
- Remove the guide rod bolt and then pivot the caliper body (A) up out of the way.
- Remove the brake pad (A).
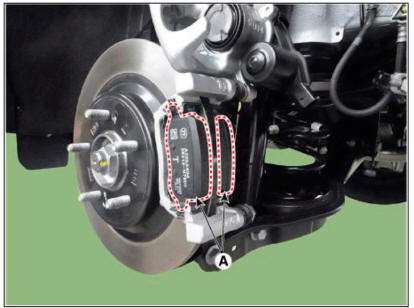
- Replace the pad liner (A) with a new one.
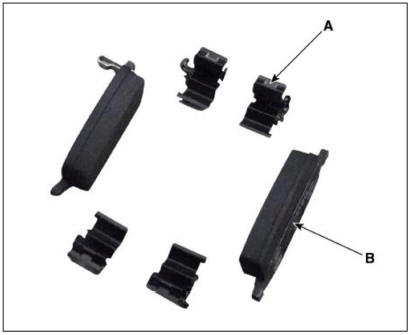
- Replace the brake pad (A) with a new one.

WARNING
When installing, use a new one pad retainer (A), brake pad (B).
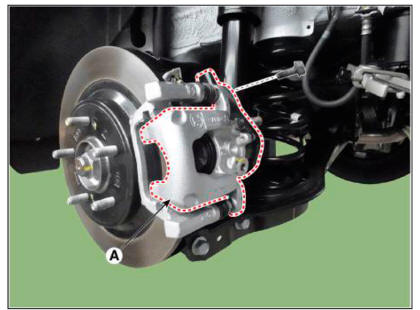
- Rotate the caliper piston and push the direction of the arrow.
- Install the caliper body (A) then tighten the guide rod bolt.
Tightening torque : 21.6 -31.4 N.m (2.2 -3.2 kgf.m. 15.9-23.1 l b - f t )
- Install the rear wheel and tire (A).
Tightening torque : 107.9 - 127.5 N.m (11.0- 13.0 kgf.m 79.6 - 94.0 lb-ft)
WARNING
Be care fill not to damage the hub bolts when removing the rear wheel and tire (A).
- After installing the rear caliper, perform "Brake Pad Replacement Mode" using the self-diagnosis. EPB Apply
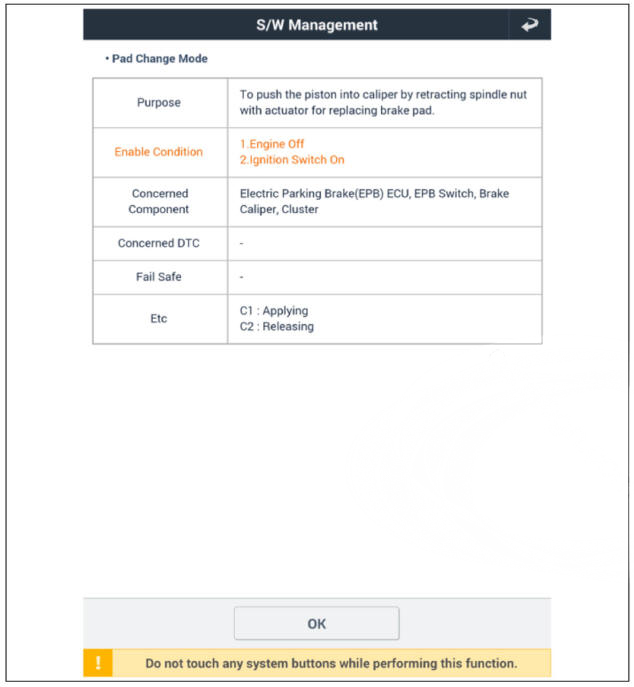
- Select CI (Apply) on the screen below.

WARNING
After replacing the brake pad is complete, make sure to repeat engagement/disengagement 3 times at "Brake Pad Replacement Mode".
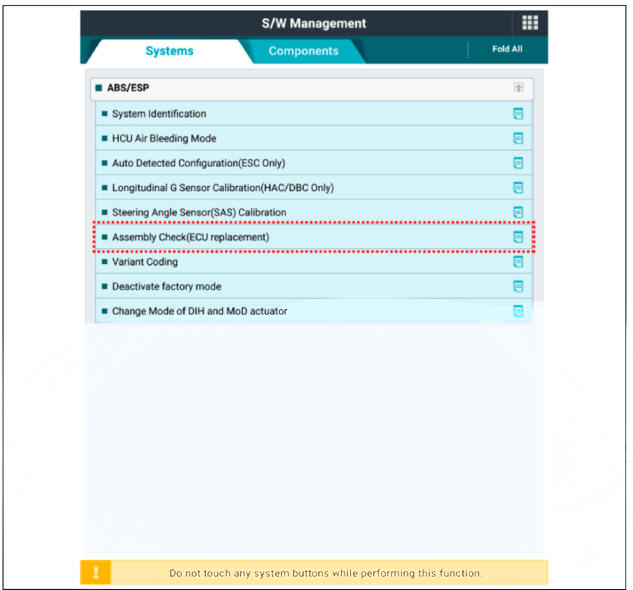
- After replacing the brake pad. make sure that the caliper is installed correctly by performing "Check assembling (ECU replaced)" from the optional function.
- After disassembling/assembling the caliper body or replacing the brake caliper, parking brake cable or brake disc, re-adjust the parking brake. EPB None Apply
- Apply the parking brake several times and check for normal operation.
- Check if the parking brake is operating normally.
Inspection
Front Brake Pad Check
- Check the pad wear. Measure the pad thickness and replace it, if it is less than the specified value.
Front brake disc thickness Pad thickness
- Standard : 10 mm (0.39 in)
- Service Limit: (0.07 in)
- Check that grease is applied, to sliding contact points and the pad and backing metal for damage.
Rear Brake Pad Check
- Check the pad wear. Measure the pad thickness and replace it, if it is less than the specified value.
Pad thickness
Standard value : 10.0 mm (0.39 in)
Service limit: 2.0 nun (0.08 in)
- Check the damage of pad. backing metal and contamination with grease.
READ NEXT:
 Brake Pedal
Components
Brake member assembly
Stop lamp switch
Brake pedal arm assembly
Brake pedal pad
Schematic Diagram
System circuit diagram
Terminal Function
Adjustment
Turn ignition switch OFF and disconnect the negat
Brake Pedal - Removal
Turn ignition switch OFF and disconnect the negative (-) batteiy cable.
Remove the crash pad lower panel.
(Refer to Body - "Crash Pad Lower Panel")
Disconnect the stop lamp switch connector (A).
Pull the locking plate (A)
Parking Brake System
Components
Lever Type
Parking brake pedal assembly
Equalizer assembly
Parking brake cable
Pedal Type
Parking brake pedal assembly
Front parking brake cable
Equalizer assembly
Rear parking brake cable
Removal
Disconnec
SEE MORE:
Occupant Classification System (OCS)
Your vehicle is equipped with an
Occupant Classification System (OCS) in
the front passenger's seat.
Main components of the Occupant
Classification System
A detection device located within the
front passenger seat cushion.
Electronic
Refrigerant System Service Basics (R- 1234yf)
Refrigerant Identification
Do not mix HFO-1234yf (R-1234yf) in the vehicle with other refrigerant,
such as R-12. R-134a and
etc.
Use only service equipment that is U.L-listed and is certified to meet
the requirements of SAE
standards
Information
- Home
- Hyundai Tucson - Fourth generation (NX4) - (2020-2023) - Owner's Manual
- Hyundai Tucson - Fourth generation (NX4) - (2020-2023) - Workshop Manual
