Hyundai Tucson: Rear Axle Assembly - Removal - 4WD
WARNING
When lifting a vehicle using a lift, be careful not to damage the lower parts of the vehicle (floor under cover, fuel filter, fuel tank, canister).
(Refer to General Information - "Lift Point")
- Loosen the rear wheel nuts slightly.
Raise the vehicle, and make sure it is securely supported.
- Remove the rear wheel and tire.
(Refer to Suspension System - "Wheel")
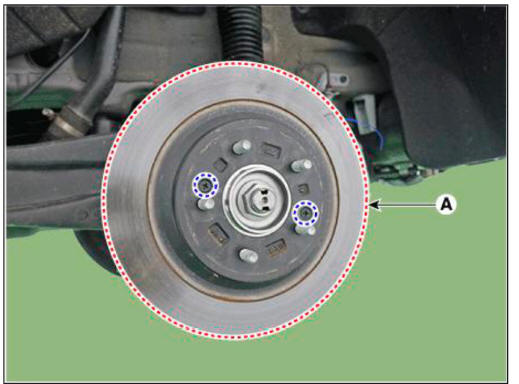
- Remove the rear brake caliper.
(Refer to Brake System - "Rear Disc Brake")
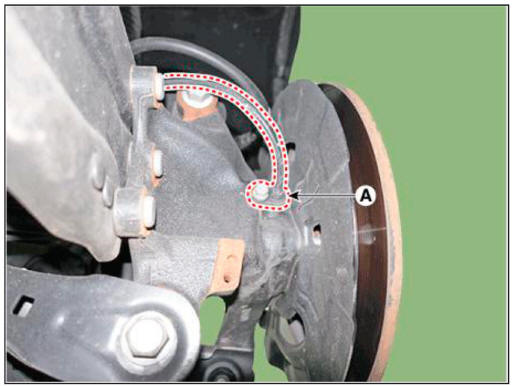
- Remove the rear brake disc (A) after loosening the screw.
Tightening torque : 4.9 - 5.9 N.m (0.5 - 0.6 kgf.m, 3.6 - 4.3 lb-ft)
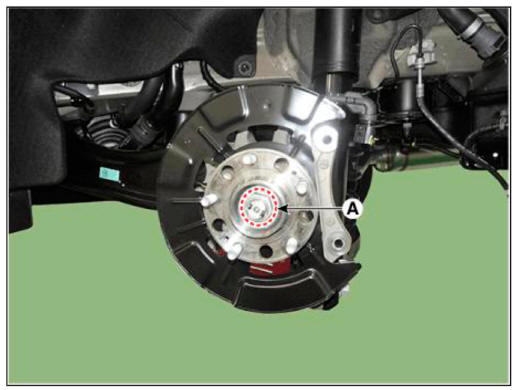
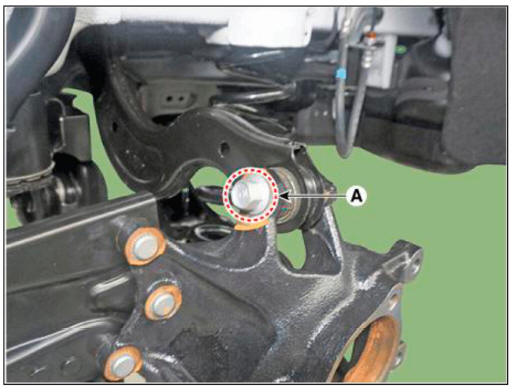
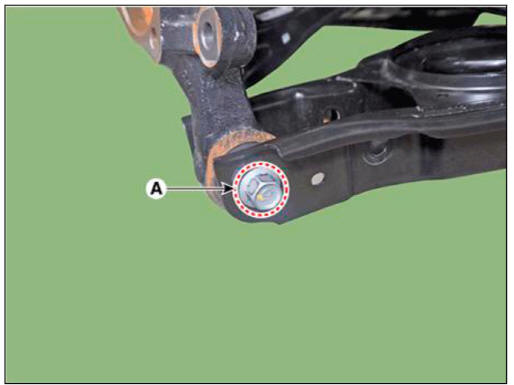
- Loosen the caulking nut (A) from the rear hub.
Tightening torque : 294.2 - 313.8 N.m (30.0 - 32.0 kgf.m, 217.0 - 231.5 lb-ft)
WARNING
- The driveshaft lock nut (A) should be replaced with new ones.
- After installation driveshaft lock nut, stake the lock nut using a chisel and hammer as shown in the illustration below.
Caulking depth : 1.5 mm (0.591 in. )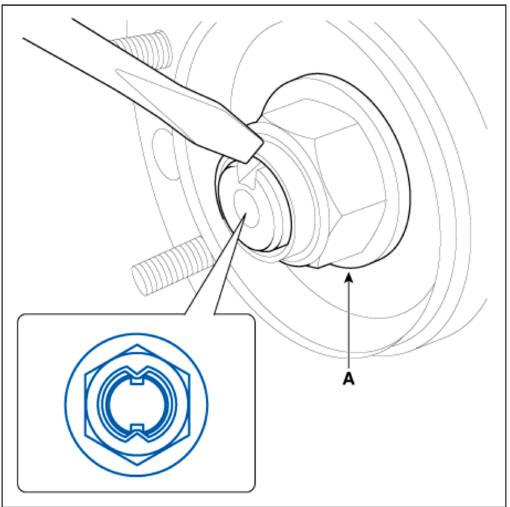
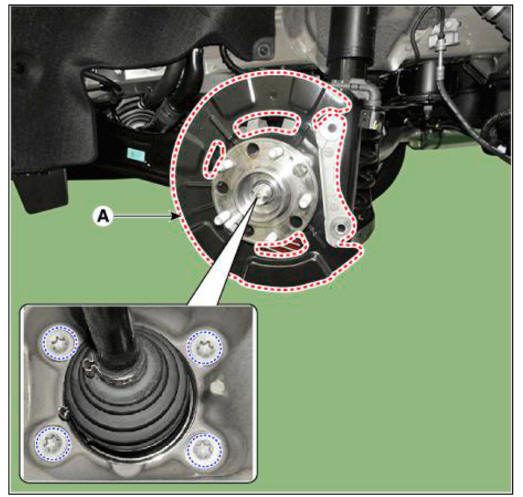
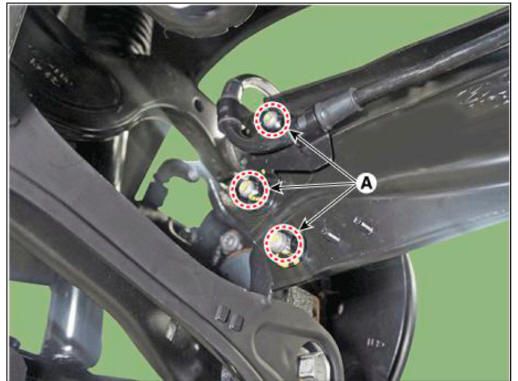
- Remove the rear hub assembly & dust cover (A) after loosening the mounting bolts.
Tightening torque: 98.0 - 117.6 N.ni (10.0 - 12.0 kgf.m, 72.3 - 86.7 lb-ft)
- Remove the rear wheel speed sensor (A) after loosening the mounting bolt.
Tightening torque : 8.8 - 13.7 N.ni (0.9 - 1.4 kgf.m. 6.5 - 10.1 lb-ft)
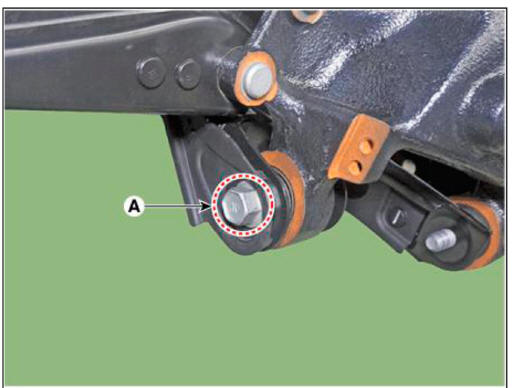
- Remove the rear upper arm from the rear carrier after loosening the mounting bolt and nut (A).
Tightening torque : 137.2- 156.9 N.m (14.0- 16.0 kgf.m, 101.2 - 115.7 lb-ft)
- Remove the trailing arm after loosening the mounting nuts (A).
Tightening torque: 98.0 - 117.6 N.ni (10.0 - 12.0 kgf.m, 72.3 - 86.7 lb-ft)
- Remove the rear assist arm after loosening the mounting bolt and nut (A).
Tightening torque : 156.9 - 176.5 N.ni (16.0 - 18.0 kgf.m, 115.7 - 130.2 lb-ft)
- Remove the rear lower arm after loosening the mounting bolt and nut (A).
Tightening torque : 137.2 - 156.9 N.m (14.0- 16.0kgf.m, 101.2- 115.7 lb-ft)
- Remove the rear earner.
Inspection
- Check the hub for cracks and the splines for wear.
- Check the rear axle carrier for cracks.
Installation
- To install, reverse the removal procedures.
- Check the alignment.
(Refer to Suspension System - "Alingment")
READ NEXT:
 Rear Driveshaft Assembly- Removal
Components
Rear drive shaft
Removal
WARNING
When lifting a vehicle using a lift, be careful not to damage the
lower parts of the vehicle (floor under cover,
fuel filter, fuel tank, canister).
(Refer to General Information - "L
Rear Driveshaft Assembly - Disassembly
Disassembly
WARNING
Do not disassemble the BJ assembly.
Special grease must be applied to the driveshaft joint. Do not
substitute with another type of grease.
The boot band should be replaced with a new one.
Remove the TJ boot bands
SEE MORE:
Climate control additional features
Auto Defogging System on Models with Automatic Temperature Control
Auto defogging helps reduce the
possibility of fogging up the inside of the
windshield by automatically sensing the
moisture on inside the windshield.
The auto defogging sy
Blind-Spot Collision-Avoidance Assist (BCA)
Blind-Spot Collision-Avoidance Assist
is designed to help detect and monitor
approaching vehicles in the driver's
blind spot area and warn the driver
of a possible collision with a warning
message and audible warning.
In addition, if there is
Information
- Home
- Hyundai Tucson - Fourth generation (NX4) - (2020-2023) - Owner's Manual
- Hyundai Tucson - Fourth generation (NX4) - (2020-2023) - Workshop Manual
