Hyundai Tucson: Front View Camera System - Removal
Hyundai Tucson - Fourth generation (NX4) - (2020-2023) - Workshop Manual / Advanced Driver Assistance System (ADAS) / Front View Camera System / Front View Camera System - Removal
Circuit Diagram
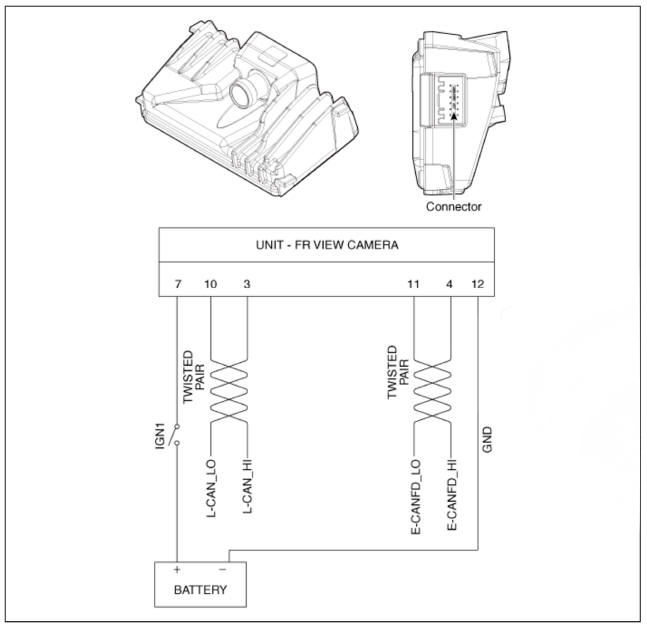

Removal
- Disconnect the negative (-) battery terminal.
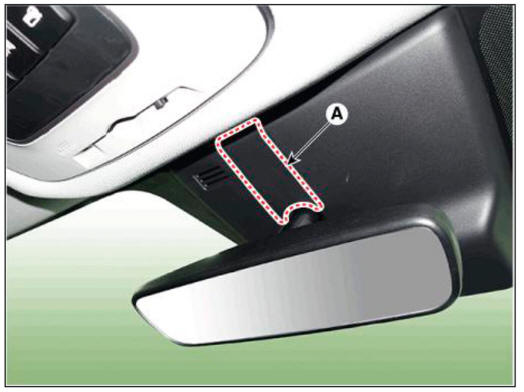
- Remove the inside rear view mirror cover (A)
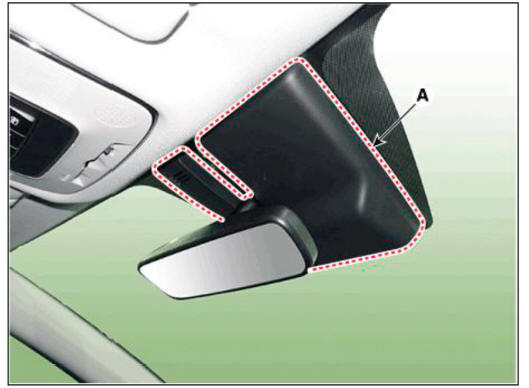
- Remove the front view camera cover (A).
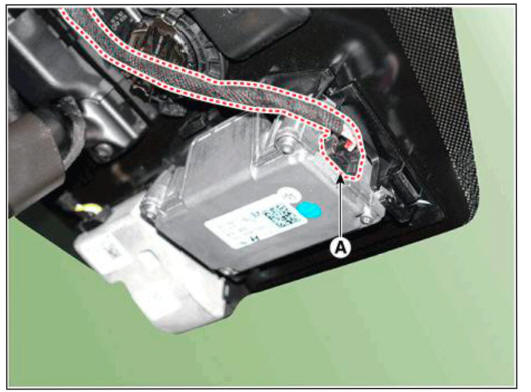
- Disconnect the front view camera connector (A).
- Separate the fixed points (A) of coupler and remove the front view camera.
WARNING
Be careful not to break the hook (A).

Installation
WARNING
- Perform the camera calibration in the following case.
(Refer to Front View Camera System - "Repair Procedure")
- I f the front view camera is replaced with a new one.
- I f the front view camera is removed and mounted.
- I f the front view camera coupler of the windshield glass is deformed.
- I f the windshield glass is changed.
- When a failure code (System Out of Calibration) occur.
- Install in the reverse order of removal.
- When if replacing the front view camera with a new one, perform the "Variant Coding" procedure by using the Diagnostic Tools.
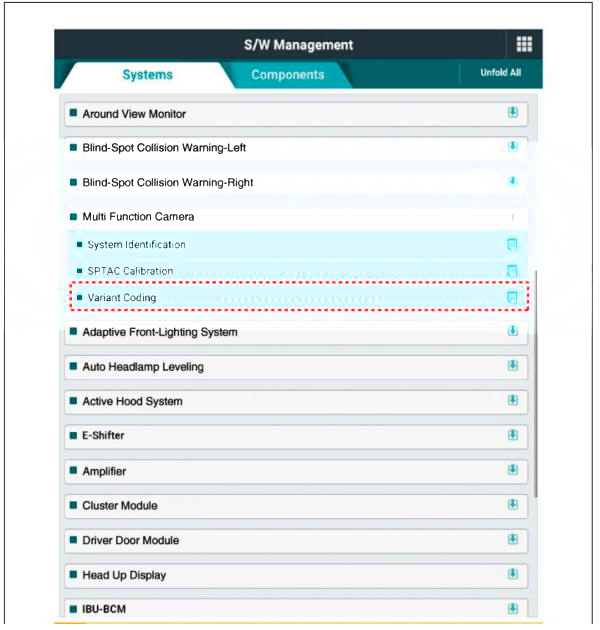

- Perform the front view camera unit calibration.
(Refer to Front View Camera System - "Repair Procedure")
READ NEXT:
 General Safety Information and Caution
Be careful when driving the vehicle using the smart cruise control
system as follows.
(1) On curves or inclines/declines
The smart cruise control system may have limits to detect distance to
the vehicle ahead due to
road and traffic
 Front Radar System - Description and operation
WARNING
The System may be limited when
The radar sensor or camera is blocked with a foreign object or
debris.
The camera lens is contaminated due to tinted filmed or coated
windshield, damaged glass, or smck of foreign matter
(sticker,
SEE MORE:
 Rear Driveshaft Assembly - Disassembly
Disassembly
WARNING
Do not disassemble the BJ assembly.
Special grease must be applied to the driveshaft joint. Do not
substitute with another type of grease.
The boot band should be replaced with a new one.
Remove the TJ boot bands
 When Ignition Key Is Turned ON (engine OFF), The ABS Warning Lamp Does Not
Light Up.
Detecting condition
When current flows in the HECU the ABS warning lamp turns from ON
to OFF as the initial check. Therefore if the lamp does not light up. the
cause may be an open in the lamp power supply circuit, a blown bulb, an
open in the bo
Information
- Home
- Hyundai Tucson - Fourth generation (NX4) - (2020-2023) - Owner's Manual
- Hyundai Tucson - Fourth generation (NX4) - (2020-2023) - Workshop Manual