Hyundai Tucson: Front seat belt pretensioner
Hyundai Tucson - Fourth generation (NX4) - (2020-2023) - Workshop Manual / Body (Interior and Exterior) / Front Seat Belt / Front seat belt pretensioner
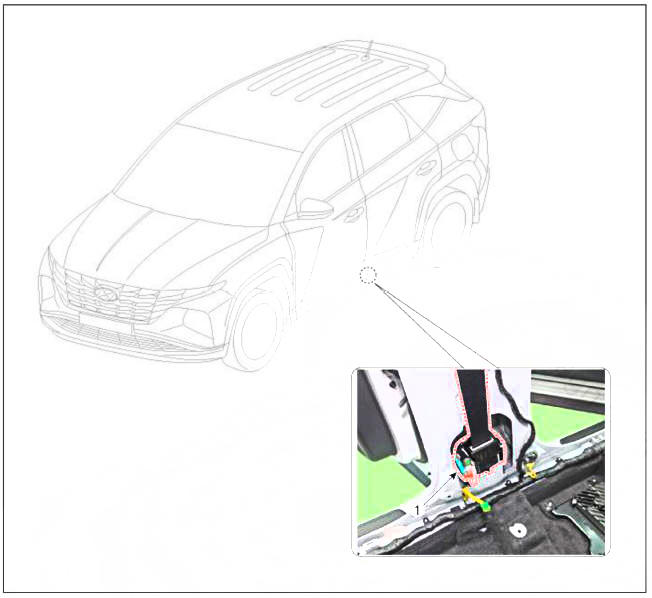
Component Location

- Front seat belt pretensioner
Replacement
WARNING
When installing the belt, make sure not to damage the pretensioner.
- Disconnect the negative (-) battery terminal.
- Remove the center pillar upper trim.
(Refer to Interior Trim - "Center Pillar Trim")
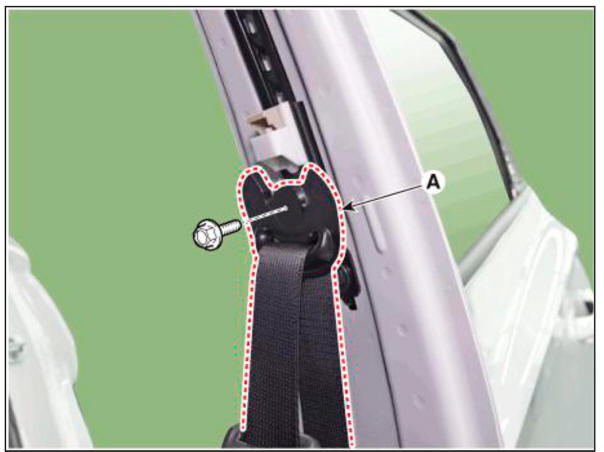
- Loosen the mounting bolt and remove the front seat belt upper anchor (A).
Tightening torque : 39.2 - 53.9 N.m (4.0 - 5.5 kgf.m , 28.9 - 39.8 lb-ft)

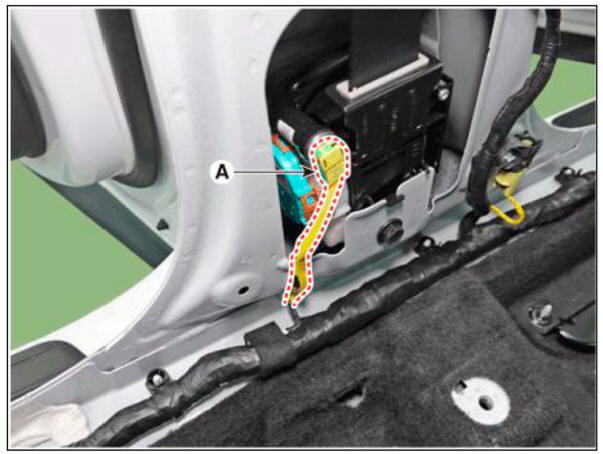
- Press the lock pin and separate the front seat belt pretensioner connector (A).

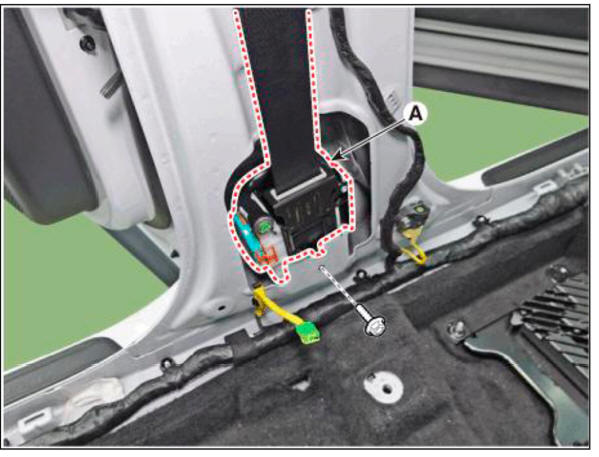
- Loosen the mounting bolt and remove the front seat belt pretensioner (A).
Tightening torque : 39.2 - 53.9 N.m (4.0 - 5.5 kgf.m , 28.9 - 39.8 lb-ft)

- To install, reverse removal procedure.
WARNING
- When installing the connector, be sure to insert it to the anchor pretensioner until "click" sound is heard and then check it for secure installation by pulling it.
- After installing the front seat belt retractor, check that the air bag warning indicator illuminates for about 6 seconds when the ignition is ON and then goes out.
- Make sure the connector is plugged in properly.
- Replace any damaged clips (or pin-type retainers).
READ NEXT:
 Height adjust
Component Location
Height adjust
Replacement
Remove the front seat belt upper anchor.
(Refer to Front Seat Belt - "Front Seat Belt Pretensioner")
After loosening the mounting bolts, then remove the height adjust (A).
T
 Rear seat belt rectrator
Components Location
Rear seat belt rectrator RH
Rear seat belt rectrator LH
Replacement
WARNING
When installing the belt, make sure not to damage the retractor.
Remove the luggage side trim.
(Refer to Trunk Trim - "Luggage S
SEE MORE:
 Brake Booster - Removal
Components
Reservoir cap
Reservoir
Brake booster
Master cylinder
Push rod
Removal
Turm ignition switch OFF and disconnect the negative (-) battery cable.
Remove the battery.
(Refer to Engine Electrical System - "Batter
 Windshield Glass - Replacement
Components
Windshield glass
Windshield glass upper molding
Replacement
WARNING
Put on gloves to prevent hand injuries.
WARNING
Use seat covers to avoid damaging any surfaces.
Remove the front pillar trim.
(Refer to Interior Tri
Information
- Home
- Hyundai Tucson - Fourth generation (NX4) - (2020-2023) - Owner's Manual
- Hyundai Tucson - Fourth generation (NX4) - (2020-2023) - Workshop Manual